The Secret to Achieving Professional-looking Paint Jobs at Home
I remember sitting on the floor of my first studio apartment, staring at a patch of scuffed, nicotine-stained beige that made the whole place feel like a waiting room. I’d spent three hours watching “pro” tutorials that promised a flawless finish but required a $200 setup and a degree in fine arts. The truth is, most people make learning how to paint a room way harder than it needs to be because they get obsessed with the wrong gear. You don’t need a professional sprayer or a dozen different brushes; you just need a solid system that doesn’t turn your weekend into a disaster zone.
I’m not here to sell you on a lifestyle of endless DIY projects or complicated multi-step prep work that drains your energy. Instead, I want to show you how to get a clean, intentional look without the burnout. I’ve boiled this down to the absolute essentials: the right tools to grab, the minimal prep required to avoid drips, and how to apply the color so it actually looks intentional. We’re going to focus on high-impact, low-effort moves that get your space looking right so you can get back to your actual life.
Table of Contents
Guide Overview
Tools & Supplies
- Angled brush for cutting in edges
- Roller and frame for large surfaces
- Paint tray for holding paint
- Extension pole for high areas
- Interior paint 1-2 gallons
- Painter's tape 1 roll
- Drop cloths 1-2 sheets
- Sandpaper 1 pack
Step-by-Step Instructions
- 1. Clear the deck. I’m not a fan of moving every single piece of furniture into the hallway just to paint one wall, so don’t do that unless you have to. Move your heavy stuff to the center of the room and cover it with a cheap drop cloth. Most importantly, clear the surfaces—get the books, the lamps, and the knick-knacks off the shelves and into a box. You can’t paint around clutter without ending up with more mess than you started with.
- 2. Prep the edges with tape. This is the one part of the job that actually feels like “work,” but if you skip it, you’ll spend three hours trying to fix drips later. Get a roll of high-quality painter’s tape and run it along the baseboards and the ceiling line. Don’t worry about being perfectly surgical here, just make sure the tape is pressed down firmly so the paint doesn’t bleed underneath.
- 3. Patch and clean. If your walls have those annoying little nail holes or scuffs from moving furniture, hit them with a tiny bit of spackle and a putty knife. Once it’s dry, sand it down until it’s flush with the wall. While you’re at it, take a damp cloth and wipe down the dust. Paint hates dust; if you apply it over a dirty wall, it’ll peel off in a few months and you’ll be right back where you started.
- 4. Cut in the corners. Grab a 2-inch angled brush—don’t buy the cheapest one in the bucket, it’ll just shed bristles into your fresh paint—and start working the edges. This means the corners, the area around the window frames, and the trim where the roller can’t reach. I call this “cutting in,” and it’s the secret to making a DIY job look like a professional did it.
- 5. Roll the main sections. Now you can finally use the big roller. Use a tray to get just enough paint on the roller, and work in small, manageable sections—about a 3×3 foot area at a time. Instead of frantic scribbling, use a “W” or an “M” motion to distribute the paint, then fill it in. It’s much faster and prevents those annoying streaks that happen when you try to spread a thin layer over a huge area.
- 6. Let it breathe before the second coat. This is where most people fail because they want to be finished. If you apply a second coat while the first is still tacky, you’re just going to pull the paint right off the wall. Check the can for the dry time, but generally, give it at least two to four hours. A second coat is non-negotiable if you want the color to actually look the way it did in the store.
- 7. Pull the tape while it’s wet. This is a pro tip I learned the hard way: don’t wait until the paint is bone-dry to peel off your painter’s tape. If the paint is still slightly damp, the tape will pull away cleanly. If you wait until it’s fully cured, you might end up ripping chunks of new paint off the wall with it. If you already waited too long, use a utility knife to lightly score the edge before pulling.
Essential Painting Tools and Supplies Without the Overkill
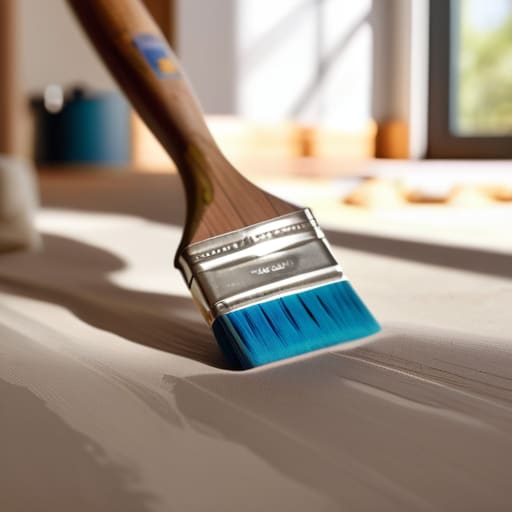
You don’t need a professional contractor’s toolkit to get a decent result, but you also shouldn’t buy the cheapest brushes at the hardware store—they’ll just shed bristles into your fresh coat and ruin the vibe. I’ve learned the hard way that investing in a few decent pieces saves you from a second trip to the store mid-project. Focus on a high-quality 2-inch angled brush for the edges and a mid-nap roller cover. When it comes to the actual liquid, don’t skimp on the best paint for interior walls; a higher-quality pigment means better coverage, which translates to fewer coats and less time spent standing on a ladder.
Before you even crack a can, prioritize protecting furniture while painting with heavy-duty canvas drop cloths rather than those thin plastic sheets that slide around and trip you up. If you’re wondering about the prep, keep it simple: a quick wipe-down with a damp cloth to remove dust is usually enough. You don’t need a full industrial sanding session unless the walls are actually peeling. Just get the basics right, keep your workspace organized, and you’ll avoid the burnout.
Smart Strategies for Protecting Furniture While Painting
The biggest mistake people make is thinking a thin sheet of newspaper is enough. It’s not. One accidental drip of the wrong shade of eggshell, and you’re looking at a permanent stain on your rug or sofa. Instead of playing defense, be proactive. Grab some heavy-duty plastic drop cloths for the floor and actual canvas cloths for your furniture. Canvas is better because it actually absorbs the spills rather than letting them pool and slide right off onto your hardwood.
If you’re working in a tight space—which, let’s be honest, most of us are—don’t try to move everything to the hallway. It’s a waste of energy. Just pull your heavy pieces into the center of the room and stack them. Once they’re grouped, wrap the entire cluster in plastic. When it comes to protecting furniture while painting, the goal is to create a single, impenetrable island in the middle of the room. This way, you can focus on your technique and your edges without constantly glancing over your shoulder, worried about a stray splatter ruining your favorite chair.
Five Ways to Stop Painting From Becoming a Weekend-Slayer
- Don’t buy every brush size under the sun. You really only need one high-quality 2.5-inch angled sash brush for the edges and a decent roller combo for the flat surfaces. Anything else is just cluttering up your closet.
- Test your color on a piece of cardboard, not the wall. Lighting changes throughout the day, and that “perfect” greige can look like a hospital hallway by 4:00 PM. Move the cardboard around the room to see how it actually reacts to your windows.
- If you’re painting mid-week, don’t try to do the whole room in one go. It’s better to do the ceiling and one wall, then stop. Trying to power through a whole room when you’re tired is how you end up with drips and uneven patches.
- Skip the expensive specialized cleaners. If you’re using water-based latex paint, a damp rag and some mild soap are all you need to clean your tools. Just make sure they are bone-dry before you put them away so they don’t get ruined.
- Use a “wet edge” approach. Don’t paint one corner of the room and then go make a sandwich. Work in small, continuous sections so the paint stays wet where the next stroke meets it. This is the only way to avoid those annoying visible lines where sections meet.
The Finish Line
At the end of the day, painting a room isn’t about achieving some museum-grade perfection; it’s about executing a solid plan so you don’t end up with a mess and a ruined weekend. You’ve got your essential tools, you’ve protected your furniture, and you’ve hopefully avoided the trap of buying every single gadget at the hardware store. If you stick to the system—prep the surfaces, use a decent primer, and keep your workspace contained—the actual painting becomes the easiest part of the process. Just focus on consistent, manageable strokes rather than rushing to finish. Once the edges are clean and the tape is pulled, you’ll realize that the effort was actually minimal compared to the payoff.
Your space should be a reflection of how you want to live, not a source of constant stress or a half-finished project that haunts your peripheral vision. I know what it’s like to live in a place that feels like it’s falling apart, but making these small, intentional changes is how you reclaim your environment. You don’t need a massive budget or a professional crew to change the energy of your apartment; you just need a little bit of discipline and the right approach. Go ahead, get the paint on the walls, and build a space that actually works for you. You’ve earned the right to enjoy your home.
Frequently Asked Questions
How do I know if I actually need a primer, or if I'm just wasting money on an extra step?
Look, I hate unnecessary steps as much as anyone, but skipping primer when you need it is a waste of money in the long run. If you’re painting over a dark color with something light, or if you’re hitting bare drywall or a glossy surface, just buy the primer. It saves you from doing three extra coats of expensive paint later. If the wall is already clean, matte, and a similar color? Skip it.
Can I just use a cheap roller from the dollar store, or is that going to leave my walls looking like a mess?
Don’t do it. I’ve been there, trying to save five bucks, and it always ends up costing more in frustration. Those cheap rollers shed lint like crazy, leaving tiny fuzzy bits stuck in your wet paint. You’ll spend twice as long trying to fix the texture as you would have spent just buying a decent mid-range nap. Buy one solid, high-quality roller cover. It’s a one-time cost that actually makes the job finish faster.
How long do I realistically have to wait before I can move my furniture back and actually use the room again?
Don’t fall for the “dry to the touch” trap. Just because the paint isn’t wet doesn’t mean it’s ready for a heavy dresser. I usually wait 24 hours before moving light furniture back, but for anything heavy or anything you’ll be sitting on, give it a full 48 to 72 hours. If you rush it, you’ll end up with permanent dents or “blocking,” where the furniture literally bonds to your fresh walls. Patience saves you a repaint.

