A Step-by-step Guide to Crafting Your Own Scented Candles
I used to think that if I wanted a house that actually smelled like a sanctuary instead of a cramped apartment, I had to drop forty bucks at a boutique for a single jar of soy wax. I spent way too much time scrolling through overly aesthetic DIY videos that required a chemistry degree and a studio apartment’s worth of specialized equipment just to learn how to make candles. The truth is, most of that “artisan” branding is just a markup on basic physics. You don’t need a laboratory; you just need a way to control your environment without draining your savings.
I’m not here to teach you a complicated hobby that will end up cluttering your kitchen counters and wasting your weekend. Instead, I’m going to show you a stripped-back, functional system for creating high-quality scents using stuff you can actually find. We’re going to focus on the essential gear, the right wax-to-wick ratios, and how to avoid the common mistakes that turn a relaxing evening into a smoky mess. This is about building a repeatable process that works, so you can scent your space and get back to your actual life.
Table of Contents
Guide Overview
Tools & Supplies
- Double boiler or heat-proof bowl for melting wax
- Thermometer to monitor wax temperature
- Pouring pitcher for controlled pouring
- Wick centering tool or clothespin to hold wicks
- Soy or paraffin wax (1-2 lbs)
- Candle wicks (set of 5-10)
- Fragrance oils (1 oz)
- Candle jars or tins (3-5 units)
Step-by-Step Instructions
- 1. First, grab your supplies. You don’t need a professional studio; just get some soy wax flakes, a few cotton wicks, some fragrance oil (check the labels to ensure they’re compatible with wax), and whatever glass jars or tins you have lying around. I usually hunt for thrifted glassware because it adds character without the price tag.
- 2. Set up a double boiler. If you don’t have one, just put a heat-safe glass bowl over a pot of simmering water. This is a non-negotiable safety step—never put wax directly on a burner or you’ll end up with a massive, expensive mess on your stove.
- 3. Melt the wax slowly. Pour your soy flakes into the bowl and stir occasionally. It takes longer than you think, so don’t rush it. While that’s happening, grab your notebook and jot down the exact measurements you’re using; I’ve learned the hard way that guessing the ratios is a fast track to a candle that won’t burn properly.
- 4. Prep your containers. While the wax is melting, take your jars and glue the metal wick tabs to the bottom center. Use a clothespin or even a bit of painter’s tape to hold the wick upright and centered. You want that wick to be perfectly straight so the candle burns evenly instead of tunneling down the sides.
- 5. Add the scent. Once the wax is completely liquid, take it off the heat and let it cool for a minute before stirring in your fragrance oil. Don’t dump it in while the wax is boiling hot, or you’ll just evaporate your money right along with the scent. Stir it gently for about two minutes to make sure everything is fully integrated.
- 6. The pour. Carefully pour the wax into your prepared jars. Leave about half an inch of space at the top. If you see any air bubbles forming, just tap the side of the jar lightly. Once they’re poured, leave them alone. Resist the urge to move them or poke them.
- 7. The waiting game. This is the hardest part for most people, but you need to let them cure. Let the candles sit in a room-temperature spot for at least 24 hours before you even think about trimming the wick. For the best scent throw, I actually let mine sit for a full week before lighting them.
Smart Sourcing Essential Soy Wax Candle Making Supplies
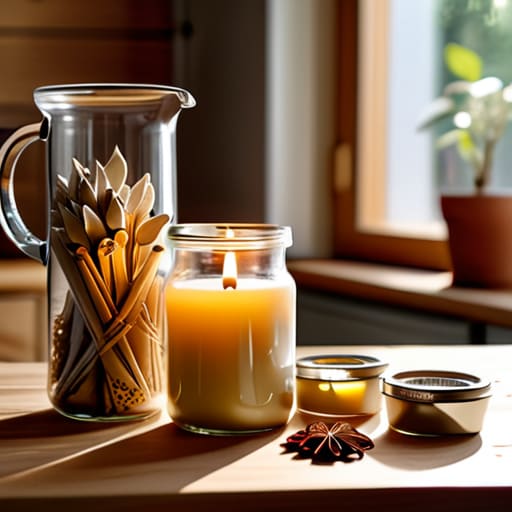
Look, you don’t need a professional studio setup to do this right, but you also shouldn’t waste your money on cheap, paraffin-heavy kits that smell like a chemical plant. When you’re looking for soy wax candle making supplies, focus on quality over quantity. I always suggest starting with a single, large bag of soy wax rather than a dozen tiny testers. It’s more cost-effective and reduces the amount of plastic waste sitting in your kitchen. If you’re just starting with candle making for beginners, stick to the basics: a reliable wax, some glass jars you already own, and a decent thermometer.
The real game-changer, though, is what you put inside the wax. If you want a scent that actually fills a room without giving you a headache, skip the synthetic fragrance oils and invest in high-quality essential oils for scented candles. They’re a bit more expensive upfront, but they align better with the minimalist, intentional lifestyle I’m trying to build. Just remember: don’t go overboard. A little goes a long way, and your bank account—and your nose—will thank you.
The Beginners Blueprint for Natural Candle Making Materials
If you’re just starting out, don’t fall into the trap of buying every shiny gadget on the market. When it comes to natural candle making materials, simplicity is your best friend. You really only need a few solid components to get a clean burn. I’ve learned the hard way that cheap, paraffin-heavy waxes are a waste of money; they smell artificial and don’t hold scent well. Stick to soy or beeswax. They’re more forgiving and actually respect the space you live in.
The real secret to a professional finish, though, lies in the details most people skip. For instance, choosing the best wick types for candles is a science, not a guess. If your wick is too thin, you get a tunnel; too thick, and you get a soot-covered mess. I always keep a small notebook of my trial runs—noting the exact temperature when I poured and how long it took to set. It’s a small bit of extra work upfront that prevents you from having to throw away a whole batch of wasted wax later.
Five ways to avoid a wax-covered disaster
- Use a thermometer, don’t guess. If you pour your wax when it’s too hot, you’ll ruin the scent; too cold, and it won’t bond to the jar. A cheap digital thermometer is the best $10 you’ll ever spend.
- Centering the wick is everything. If that wick drifts to the side, you’ll end up with a lopsided burn and a melted mess on your table. Use a wick centering tool or even just a clothespin to keep it dead center while the wax sets.
- Don’t skimp on the fragrance load. There is a sweet spot for how much oil a specific type of wax can actually hold. Go too heavy, and the oil will seep out of the candle; go too light, and your apartment will smell like nothing.
- Give them time to cure. I know you want to light it immediately, but soy wax needs time to “settle” so the scent throw actually works. Let them sit for at least a week before you even think about striking a match.
- Prep your vessels properly. Any dust or moisture inside the jar will mess with the wax adhesion. Give your jars a quick wipe with isopropyl alcohol before you start—it takes ten seconds and prevents those annoying air bubbles.
The Bottom Line
At the end of the day, making your own candles isn’t about achieving some impossible level of artisanal perfection on your first try. It’s about the system: sourcing decent soy wax, picking scents that don’t give you a headache, and following a process that doesn’t turn your kitchen into a disaster zone. If your first wick isn’t perfectly centered or the scent throw is a little weak, don’t sweat it. You’ve already bypassed the massive markup of luxury brands and taken control of what’s actually sitting on your coffee table. Just keep your supplies organized, stay mindful of your temperatures, and focus on consistent, repeatable results rather than chasing a Pinterest-perfect aesthetic.
I know life gets loud and your to-do list is probably never going to be empty, but there is something deeply grounding about creating something functional with your own hands. It’s a small, quiet win that stays with you long after the candle is lit. You don’t need a massive workshop or a specialized degree to build a life that feels curated and intentional. Start with these basics, master the rhythm of the craft, and remember that the goal is to serve your lifestyle, not to add more clutter to it. Now, go light one of those candles and actually enjoy the space you’ve built.
Frequently Asked Questions
How do I stop my candles from tunneling or having that weird sinkhole in the middle?
Tunneling usually happens because your wick is too small for the jar, or you didn’t let the first burn last long enough. If the wax isn’t melting all the way to the edges, the candle will just keep digging a hole down the center. To fix a current mess, grab a hairdryer or a heat gun, melt that uneven surface flat, and let it reset. Moving forward, just make sure your first burn reaches the sides.
Is it actually worth the extra cost to use essential oils instead of fragrance oils?
Honestly? Usually, no. If you’re looking for that heavy, room-filling scent you get from high-end boutique candles, essential oils will probably disappoint you. They’re subtle, expensive, and can be finicky to work with. Stick to high-quality fragrance oils if you want a reliable throw. Only go the essential oil route if you’re strictly focused on aromatherapy or a zero-synthetic lifestyle. For most of us, the extra cost just doesn’t yield the same result.
How can I tell if my wick is too big or too small for the jar I'm using?
The easiest way to tell is by watching the burn. If you see the wax melting all the way to the edges of the jar, your wick is too small—you’re left with “tunneling,” which is just wasted money. If the flame is dancing wildly, smoking, or getting way too hot, your wick is too big. You want a steady, calm flame that creates a smooth, even pool of liquid wax across the surface.

