The Foolproof Way to Hang Pictures Straight Every Time
I was staring at a pile of half-unpacked boxes and a single, crooked landscape print when it hit me: I’ve spent more time fighting my own walls than actually enjoying my apartment. Most people think you need a massive toolbox or a degree in construction to master how to hang a picture, but that’s just a lie that keeps your home looking like a temporary dorm room. I grew up in a space where we didn’t have a garage full of power tools, so I had to learn the hard way that precision isn’t about how much gear you own; it’s about knowing exactly where the stud is and not overthinking the process.
This guide isn’t about some complicated, thirty-step DIY project that eats up your entire Saturday. I’m going to show you the minimalist system for getting frames on the wall straight, secure, and fast. We’re skipping the fluff and focusing on the only three things that actually matter: choosing the right hardware, finding your marks without the headache, and making sure nothing ends up slanted by Tuesday. Let’s get your space looking intentional so you can get back to your life.
Table of Contents
Guide Overview
Tools & Supplies
- Hammer for driving nails or hooks
- Pencil for marking the spot
- Measuring tape for accuracy
- Level to ensure straightness
- Picture frame 1 unit
- Picture hanging hardware 1 pack
- Wall anchors if using drywall without studs
Step-by-Step Instructions
- 1. First, clear your workspace and grab your tools. You don’t need a professional workshop, but you do need a hammer, a level, a pencil, and a drill if you’re dealing with anything heavier than a postcard. I always keep a small kit in my utility drawer so I’m not scouring the house for a screwdriver halfway through the job.
- 2. Decide on the weight of your frame before you even touch the wall. If it’s a lightweight print, a simple nail works fine. If it’s a heavy, vintage frame with actual glass, you’re going to need a wall anchor or you’ll end up with a hole in your drywall and a shattered frame on the floor.
- 3. Measure the distance between the hanging hardware on the back of the frame. Most people make the mistake of marking the top of the frame on the wall, which results in the picture sitting much lower than intended. Measure from the wire or the bracket to the top of the frame, and keep that number in your notebook so you don’t forget it.
- 4. Mark your spot with a pencil, but don’t just wing it. Use a level to ensure your eye line is straight, then mark the exact point where the nail or screw will go. I try to aim for the stud in the wall whenever possible; it’s the difference between a picture that stays put and one that slowly slides down the wall over the next month.
- 5. Drive your nail or screw into the mark. If you’re using an anchor, drill a pilot hole first—don’t try to force it, or you’ll just crack the plaster. Do this slowly and steadily to avoid any sudden slips that might ruin your paint job.
- 6. Hang the frame and do a final level check. Don’t just step back and squint from across the room; get close and actually use the level on the frame itself. If it’s slightly off, adjust it now. It’s much easier to fix a tilt while the tools are still in your hand than it is to redo the whole thing later.
Picking Picture Hanging Hardware Types Without the Decision Fatigue
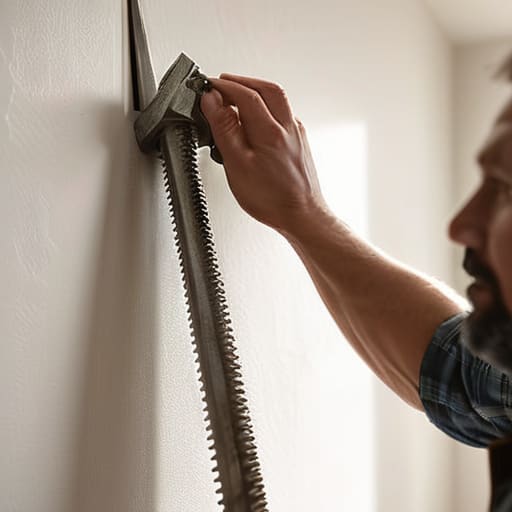
Walking into a hardware store is a recipe for decision fatigue. You’ll see rows of plastic hooks, brass nails, and heavy-duty anchors, and suddenly you’re staring at a wall of metal wondering if you’re overthinking it. Here’s the reality: most of what you see is overkill. If you’re just putting up a standard frame, a simple sawtooth hanger or a basic nail is fine. But if you’re hanging heavy frames on drywall, don’t trust a tiny nail to do the heavy lifting. Grab some screw-in anchors. It takes thirty seconds more, but it saves you from the nightmare of a shattered glass frame hitting your floor at 2 AM.
My rule of thumb is to match the hardware to the weight, not the aesthetic. For lightweight prints or canvases, keep it minimal to avoid wall damage when hanging art. If you’re planning a more complex setup, like those Pinterest-heavy gallery wall layout ideas, stick to a consistent type of hook so the visual weight feels balanced. You don’t need a specialized toolkit for every single piece; you just need to know which anchor won’t quit on you.
Mastering Wall Mounting Tools and Supplies for Repeatable Wins
You don’t need a garage full of power tools to get this right, but you do need a few specific items to stop the frustration before it starts. If you’re tired of staring at crooked frames, invest in a decent bubble level and a handful of high-quality command strips or screw-in anchors. Most people fail because they try to eyeball it, but learning how to use a level for art is the difference between a professional-looking space and a room that feels slightly “off.” Keep a small kit of wall mounting tools and supplies in one dedicated bin—hammer, level, measuring tape, and a pencil—so you aren’t hunting through junk drawers mid-project.
When you’re dealing with larger pieces, the stakes get higher. If you’re hanging heavy frames on drywall, skip the tiny nails; they’ll eventually sag or pull out, leaving a mess. Use a toggle bolt or a heavy-duty anchor to ensure the weight is actually distributed into the wall. My rule is simple: if the frame weighs more than a bag of flour, it needs more than just a nail. It’s about building a system that stays put so you can stop worrying about it.
Five Ways to Avoid Making a Mess of Your Walls
- Stop eyeballing it. Even if you think you have a “feel” for where things go, your eyes will lie to you once you step back. Use a level—it’s not just for professionals, it’s for anyone who doesn’t want to live with a crooked living room.
- Test the height on a piece of scrap paper first. Trace the frame, tape it to the wall, and walk around the room. It takes ten seconds and saves you from drilling five holes because you realized the art is way too high.
- Check for studs before you get too attached to a spot. I’ve learned the hard way that hanging a heavy frame on just drywall is a recipe for a midnight disaster. If you can’t hit a stud, make sure your hardware is rated for the weight.
- Don’t forget the “command strip” trap. They work for light stuff, but if you’re hanging anything with actual weight or glass, use real hardware. I’d rather spend five minutes drilling a hole than twenty minutes scraping adhesive off my paint.
- Keep your tools in one dedicated spot. Don’t go hunting through a junk drawer for a screwdriver halfway through the job. If you have your kit ready, you can finish the task and get back to whatever you were actually doing.
Done and Dusted
At the end of the day, hanging art isn’t about being a master carpenter; it’s about having the right systems in place so you aren’t staring at a pile of hardware for three hours. You’ve got your hardware sorted to avoid decision fatigue, you’ve got the right tools to ensure nothing ends up crooked, and you’ve learned how to work with your walls rather than against them. The goal was to get these pieces up without turning your living room into a construction zone. Once you’ve found the stud or secured that anchor, the heavy lifting is over. Now, it’s just about closing the toolbox and enjoying the view.
Your space should feel like it belongs to you, not like a showroom you’re afraid to touch. Don’t let the fear of a single misplaced nail keep your walls bare or your home feeling unfinished. These small, repeatable wins—like finally mounting that print you bought months ago—are what actually build a sense of intentional living. You don’t need a massive renovation to make a room feel complete; you just need to take ten minutes, use the right method, and let your environment finally reflect who you are. Now, step back, grab a drink, and actually enjoy the space you’ve built.
Frequently Asked Questions
What do I do if I've already messed up the wall with too many holes?
Look, we’ve all been there. You’re trying to find the “perfect” spot, and suddenly your wall looks like Swiss cheese. Don’t panic and don’t try to just paint over them; it’ll look terrible. Grab a small tub of lightweight spackle and a putty knife. Fill the holes, wipe the excess with a damp cloth, let it dry, and sand it smooth. Once it’s flush, a quick dab of matching paint makes the mistake disappear.
How do I hang something heavy without it feeling like I'm drilling into my apartment's foundation?
If you’re renting or just don’t want to destroy your drywall, stop reaching for the power drill. For anything heavy—think mirrors or thick frames—skip the nails and go straight to heavy-duty Command strips or, better yet, screw-in anchors. If you can find a stud, use it. It’s the only way to ensure that piece stays put without making your walls look like a crime scene. Minimal effort, maximum stability.
Is there a way to get the height right without having to stand on a chair and squint for ten minutes?
Yeah, there is. Stop the chair-squinting madness. Use the “eye-level” rule: the center of the image should be about 57 to 60 inches from the floor. To actually mark it without a ladder, grab a piece of painter’s tape. Stick it on the wall where you think it goes, mark your spots on the tape, then pull the tape off. It keeps the wall clean and saves your neck.

