Constructing a Custom Trellis for Your Climbing Plants
I remember standing in my tiny apartment balcony garden three years ago, watching a massive, expensive tomato plant slowly collapse under its own weight because the flimsy plastic support I’d bought snapped in a light breeze. It was a total waste of money and effort. Most people think you need a workshop full of power tools or a massive budget to support climbing plants, but that’s a myth. Learning how to build a garden trellis shouldn’t feel like a weekend-long construction project that leaves you exhausted and broke. You don’t need a master’s degree in carpentry; you just need a few sturdy materials and a plan that actually works with your space instead of against it.
In this guide, I’m skipping the over-complicated blueprints and the unnecessary fluff. I’m going to show you how to construct a functional, minimalist trellis using basic materials you can find at any hardware store. We’re focusing on a design that is built to last but easy enough to assemble in under thirty minutes. My goal is to give you a system that keeps your plants upright and your garden looking intentional, without turning your hobby into a second job.
Table of Contents
Guide Overview
Tools & Supplies
- Measuring tape for accurate cuts
- Handsaw or miter saw for wood cutting
- Drill with bits for making holes
- Screwdriver or drill driver for fastening
- Cedar or pressure-treated wood stakes (4 count)
- Wooden lattice panels or thin slats (1-2 units)
- Exterior grade wood screws (1 box)
- Garden staples or wire (1 roll)
Step-by-Step Instructions
- 1. First, grab your materials. You don’t need a trip to a massive hardware warehouse for this; just pick up a few cedar or redwood stakes, some heavy-duty twine, and a pair of garden snips. I prefer cedar because it’s naturally rot-resistant, meaning you won’t be rebuilding this entire thing in six months when the rain hits.
- 2. Clear a small patch of ground where you want the trellis to sit. You want to make sure the area is relatively level so the structure doesn’t lean awkwardly. If you’re planting something heavy like beans or cucumbers, I recommend driving the stakes at least eight inches into the soil to give them a solid foundation that won’t tip over under the weight of the vines.
- 3. Set your stakes in a rectangular or square pattern depending on how much space your plants actually need. Don’t overthink the geometry; as long as they are sturdy and spaced evenly, the plants will find their way. If you’re working with a wall or a fence, you can skip the ground stakes and use some simple metal brackets to attach your frame directly to the structure.
- 4. Now, we create the grid. Take your twine and tie it to the top corner of your first stake, then pull it across to the next one. You want to create a series of horizontal lines that act like a ladder for your plants. I usually space these about six to eight inches apart—it’s enough room for the stems to breathe but tight enough to provide constant support.
- 5. As you tie each line, use a simple double knot and trim the excess. If you find the twine is sagging too much in the middle, just add a small secondary support stake in the center of the span. It’s a five-minute fix that prevents the whole system from looking messy and defeated halfway through the growing season.
- 6. Once your grid is tight and secure, give it a quick tug to make sure nothing is loose. If you’re planting something particularly aggressive, you might want to add a few diagonal lines to create a diamond pattern. This adds a bit of extra structural integrity without requiring any additional heavy lifting or complex tools.
Smart Wooden Trellis Design Ideas for Maximum Growth
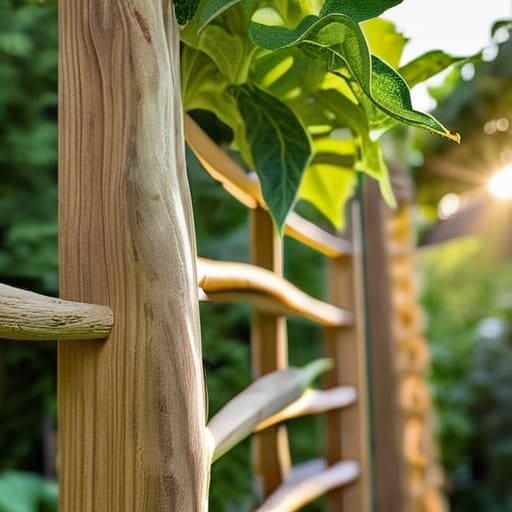
If you’re looking for more than just a basic frame, start thinking about the specific needs of your plants. Not all greenery is created equal. For lighter climbers like sweet peas, a simple lattice works fine, but if you’re planning on growing something substantial like squash or heavy jasmine, you need a trellis for heavy vines that won’t buckle under the weight. I usually suggest doubling up your horizontal supports or using thicker timber for these heavier loads. It’s better to over-engineer the structure now than to spend your summer cleaning up a collapsed heap of wet leaves and broken wood.
Another way to maximize your space is to lean into vertical gardening techniques by integrating your trellis into existing structures. Instead of a standalone unit, try mounting your supports directly against a fence or a sturdy wall. This creates a much more stable system and saves you from having to dig extra post holes. If you’re working with limited square footage, look into easy DIY garden structures that utilize height rather than floor space. It’s about making the most of what you have without turning your yard into a cluttered mess.
The Essential Garden Trellis Materials List for Minimalists
When you’re putting together your garden trellis materials list, resist the urge to run to the big-box hardware store and buy everything in sight. Most people overcomplicate this by grabbing expensive, treated lumber that ends up looking bulky and awkward in a small space. I prefer keeping it lean. If you’re working with standard vegetables, cedar or redwood are your best bets because they naturally resist rot without needing a chemical cocktail. If you’re on a tighter budget, even untreated pine works, provided you don’t mind replacing it in a few seasons.
The real trick is matching your hardware to your specific plants. If you’re building climbing plant support structures for something lightweight like sweet peas, simple twine and thin bamboo stakes are plenty. However, if you’re planning for heavy hitters like squash or heirloom tomatoes, you need to invest in thicker, more robust timber and heavy-duty galvanized screws. Don’t skimp on the fasteners; there is nothing more frustrating than a weekend project collapsing under its own weight because you used cheap, flimsy nails.
Five Ways to Keep Your Trellis from Becoming a Weekend Headache
- Don’t overthink the geometry. A simple rectangular frame is easier to build, easier to stabilize, and much harder to mess up than some complex geometric pattern that looks cool on Pinterest but collapses under its own weight.
- Prioritize stability over aesthetics. If you aren’t driving your support posts at least eight inches into the ground, a heavy vine or a sudden summer storm will turn your hard work into a pile of debris on your patio.
- Leave breathing room. It’s tempting to pack the structure with as much mesh or wire as possible, but plants need airflow to prevent rot. Build for the plant’s health, not just for the visual density.
- Use hardware that actually lasts. I’ve seen too many people use cheap staples or thin twine that snaps after one season. Spend the extra five bucks on galvanized screws or heavy-duty coated wire; it’s a one-time cost that saves you from rebuilding next year.
- Plan for the weight. If you’re growing something heavy like squash or cucumbers, your trellis needs to be a structural system, not just a decoration. Build it beefy enough to handle the load so you aren’t constantly propping it up with extra sticks.
Getting It Done
At the end of the day, building this trellis isn’t about creating a museum-quality piece of garden art; it’s about setting up a functional support system that works while you’re busy doing other things. You’ve got your materials list, you’ve picked a design that won’t rot in a month, and you’ve got the basic steps down. By choosing minimalist materials and a sturdy design, you’ve essentially automated a part of your garden’s growth. You aren’t spending your entire Saturday playing architect; you’re just installing the infrastructure your plants need to thrive without you having to micromanage them every single afternoon.
Don’t let the “perfect” garden keep you from starting a real one. It’s easy to get caught up in expensive landscaping trends, but there is a quiet, underrated satisfaction in knowing you built something useful with your own two hands and a few basic tools. Once this trellis is up and your vines start climbing, you’ll realize that the goal wasn’t just to grow better tomatoes or peas—it was to build a sustainable routine that keeps your space looking intentional. Get the wood, drive the screws, and let the plants do the heavy lifting from here on out.
Frequently Asked Questions
How do I stop the trellis from leaning or sinking into the soil after a heavy rain?
The quick fix is all about the foundation. If your posts are sinking, you haven’t gone deep enough. Don’t just stick them in the dirt; dig a hole at least 12 inches deep and use a bit of crushed gravel at the bottom for drainage. If it’s leaning, it’s likely top-heavy. Add a cross-brace or a secondary anchor stake. It’s a small extra step that saves you from rebuilding the whole thing next month.
Is it worth spending more on treated wood, or can I just use whatever I have lying around the garage?
Look, I get the urge to scavenge the garage, but don’t do it unless you’re prepared to rebuild this in six months. If you use random scrap, rot and termites will turn your project into a pile of mush before the season ends. Spend the extra few bucks on pressure-treated wood or cedar. It’s a small upfront cost that saves you the headache of a total rebuild later. Build it once, build it right.
How do I attach the trellis to a wall without causing permanent damage or moisture issues?
If you’re renting or just don’t want to commit to drilling permanent holes, skip the heavy-duty anchors. Use heavy-duty command hooks or tension rods if you’re working in a window nook. If you have to drill, just keep the trellis a few inches away from the siding using spacers. This creates a small air gap that prevents moisture from getting trapped against the wall, which is how you avoid rot and mold issues down the line.

