Tips for Installing Shelves That Are Actually Secure
I was staring at a stack of half-unpacked boxes in my first studio apartment, realizing that my entire life was currently living on the floor because I was too intimidated by a single piece of drywall. I used to think that knowing how to install a shelf required a professional contractor or a garage full of heavy-duty power tools, but that’s just a myth that keeps people living in clutter. The truth is, you don’t need a degree in construction to reclaim your vertical space; you just need to understand how your walls actually work and stop overcomplicating the physics of it all.
I’m not here to give you a twenty-step lecture or suggest you buy a toolset that costs more than your monthly groceries. Instead, I’m going to show you the most efficient way to get those brackets level and secure so you can finally clear your surfaces and get back to your actual life. We’re going to focus on the minimalist essentials—the specific anchors, the right drill bits, and the one trick to avoid the dreaded crooked shelf—so you can get the job done right the first time.
Table of Contents
Guide Overview
Tools & Supplies
- Drill/Driver for making holes and driving screws
- Level to ensure the shelf is straight
- Pencil for marking placement
- Stud finder to locate wall supports
- Shelf and brackets (1 set)
- Wall anchors or screws (1 set)
Step-by-Step Instructions
- 1. First, figure out what you’re actually putting on this shelf. There’s no point in using tiny plastic wall plugs if you plan on stacking heavy art books or a collection of vintage synths. Grab your shelf, your brackets, and a stud finder. If you can hit a stud, do it—it makes the whole thing infinitely more stable and saves you from the nightmare of a collapsing shelf later.
- 2. Once you know where the support is, mark your spots. Don’t just eyeball it and hope for the best; that’s how you end up with crooked lines that drive you crazy every time you walk past. Use a level—a real one, not a phone app—to draw a light pencil line where the shelf will sit. If you don’t have a level, find a straight edge and use it to make sure your marks aren’t drifting upward or downward.
- 3. Time to make some holes. If you’re hitting a stud, you can just drill a pilot hole to keep the wood from splitting. If you’re mounting into drywall, you’ll need to use those anchors I mentioned earlier. Measure twice, drill once. If you’re off by even a fraction of an inch, the brackets won’t line up, and you’ll be back at the hardware store before you even started.
- 4. Screw in your brackets. Line them up with your marks and drive the screws in. Don’t go full power drill on these; if you tighten them too hard, you might strip the hole or crack the drywall. I prefer using a handheld screwdriver for the final turns just to feel the resistance. You want them tight enough that they don’t wiggle, but not so tight that you’re fighting the tool.
- 5. Set the shelf on top and check it one last time. Place the wood on the brackets and give it a gentle press with your hand. If it feels solid, go ahead and secure it from underneath using the small screws that came with your bracket kit. This step is what actually locks everything in place so the shelf doesn’t slide off if someone bumps into it.
- 6. Clean up the mess and move on. Take a damp cloth, wipe away the drywall dust, and erase those pencil marks. The goal here was to get the shelf up so you could actually use your space, not to spend your entire Saturday cleaning. Get it done, admire the new setup for exactly thirty seconds, and then get back to whatever you were doing.
Mastering Your Wall Stud Finder Guide for Zero Stress
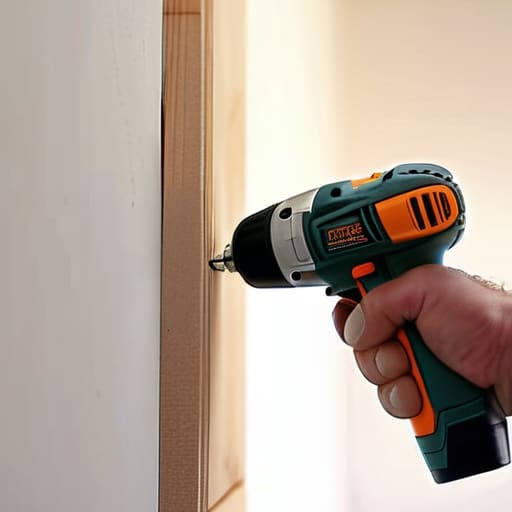
Look, I’ve seen too many people try to wing it by just guessing where the support is, only to end up with a pile of drywall dust and a shelf hanging at a sad angle. If you aren’t hitting a stud, you’re relying entirely on wall anchor weight capacity, and that’s a gamble I’m not willing to take with my books or my plants. Most cheap plastic anchors are fine for a light picture frame, but for anything substantial, you need to find that wood.
When you’re using your device, don’t just swipe once and call it a day. Move slowly. I usually do a quick scan of the area, then a second, more deliberate pass to confirm the center of the stud. It’s the difference between a solid mount and a midnight emergency where your decor is suddenly on the floor. Understanding the distinction between drilling into drywall vs studs is the single most important part of this whole process. If you find the wood, you’ve won half the battle; if you don’t, you’ll need to pivot to heavy-duty anchors that actually know how to grip.
Choosing Heavy Duty Shelf Mounting Hardware That Actually Holds
Look, the biggest mistake I see people make is assuming every little screw in a hardware store box is created equal. If you’re planning on putting anything heavier than a single succulent on that shelf, you need to stop looking at the aesthetics and start looking at the specs. You need to know the wall anchor weight capacity before you even pick up a drill. If you’re just hanging a light picture frame, plastic anchors are fine, but if you’re loading up books or kitchen gear, you need to be looking at steel toggles or heavy-duty bolts.
The real secret to a shelf that doesn’t end up in a pile of drywall dust on your floor is understanding the difference between drilling into drywall vs studs. If you hit a stud, you’re golden—just use a long wood screw and call it a day. But if you’re stuck in the empty space between them, don’t try to “make it work” with cheap plastic plugs. Invest in high-quality heavy-duty shelf mounting hardware that is specifically rated for the load you’re planning to carry. It costs an extra five bucks now, but it’s much cheaper than replacing a broken shelf and a ruined floor later.
Five Ways to Avoid the "I Should Have Done This Differently" Regret
- Double-check your level before you drill. I’ve seen too many people trust their eyes, only to realize halfway through that their “straight” shelf is actually a slow-motion slide toward the floor. Use a real level, not a phone app.
- Don’t forget the “clearance test.” Before you commit to a permanent hole in the drywall, hold the shelf up to the wall and make sure it isn’t going to hit your lamp, your window frame, or your head when you walk past.
- Keep your hardware organized in a small tray or even a bowl. There is nothing more frustrating than losing a tiny screw in a pile of sawdust when you’re halfway through the job and just want to be finished.
- If you aren’t hitting a stud, don’t try to “wing it” with cheap plastic anchors. If the shelf is holding anything heavier than a single postcard, use the heavy-duty toggle bolts we talked about. It’s better to spend five extra minutes on hardware than three hours patching holes.
- Clean up as you go. It sounds like a chore, but if you sweep up the drywall dust immediately, you won’t be scrubbing white powder off your rug for the next three days. Just grab a damp cloth and move on.
Done and Dusted
At the end of the day, installing a shelf isn’t about being a master carpenter; it’s just about following a decent system. You found your studs, you picked hardware that isn’t going to buckle under the weight of your books, and you actually leveled the thing instead of just eyeballing it. If you did those three things, you’ve already avoided the most common mistakes that turn a quick DIY project into a weekend-long headache. Don’t worry if there’s a tiny bit of dust on the floor or a slightly imperfect drill hole—as long as that shelf is securely anchored and holding what it’s supposed to, you’ve won.
My philosophy has always been that your space should work for you, not the other way around. Every small upgrade you make, like adding a single functional shelf, is a step toward reclaiming your environment and making it feel like yours. You don’t need a massive renovation budget or a professional contractor to create a home that feels intentional and organized. Just take it one task at a time, keep your tools ready, and focus on those small, repeatable wins. Now, get those items off the floor and onto the wall so you can finally get back to your actual life.
Frequently Asked Questions
What do I do if my stud finder keeps giving me false readings or I can't find a stud where I need one?
If your stud finder is acting up, stop trusting it blindly. They’re finicky. Instead, try the “knock test”—tap the wall until the sound changes from hollow to a solid thud. If that fails, grab a strong magnet; it’ll snap to the screws holding your drywall to the studs. If you still can’t find one where you need it, don’t force it. Just switch to heavy-duty toggle bolts. They’re a lifesaver when the studs aren’t cooperating.
Can I actually hang a shelf in drywall without hitting a stud, or am I just asking for a disaster?
You can, but you can’t just wing it. If you try to screw directly into drywall without a stud, you’re basically just making a hole for nothing. You need anchors. If you aren’t hitting a stud, grab some high-quality toggle bolts—not those cheap plastic plug things that spin in circles. They grip the back of the wall and actually hold weight. Just don’t go overboard; the heavier the stuff, the more you really want that stud.
How do I know if my shelf is actually level without spending a fortune on professional tools?
You don’t need a $50 laser level to get this right. If you’ve got a smartphone, you’ve already got a level. Download a basic level app—most are free—and just lay the phone flat on the shelf once you’ve positioned it. If you’re old school, grab a long ruler and a heavy marble or even a round pen; roll it across the surface. If it drifts, your shelf is crooked. Simple.

