Diy Wall Decor That Looks Like It Came From a Boutique
I spent most of my childhood staring at the same beige, scuffed-up walls of a cramped apartment, wishing I could change the vibe without spending a week’s worth of groceries on a single framed print. Most people think you need a massive budget or a degree in fine arts to fix a blank space, but that’s a lie. Learning how to make wall art shouldn’t feel like a second job or a sinkhole for your savings. I’ve learned that the most impactful decor usually comes from repurposing what you already own and applying a bit of intentionality, rather than buying mass-produced junk that looks like it came straight out of a cardboard box.
In this guide, I’m skipping the complicated, multi-step DIY projects that end in a pile of wasted supplies and a headache. Instead, I’m sharing a few low-effort, high-impact systems for creating custom pieces that actually look intentional. We’re going to focus on methods that take less than an hour and use basic materials you likely already have in a junk drawer or a thrift store bin. My goal is to help you build a space that feels like yours without sacrificing your weekend or your sanity.
Table of Contents
Guide Overview
Tools & Supplies
- Paintbrush for applying colors
- Painter's tape for creating clean lines
- Spatula for mixing paints
- Canvas or wooden panel (1 unit)
- Acrylic paint set (1 set)
- Masking tape (1 roll)
- Water container (1 unit)
Step-by-Step Instructions
- 1. First, pick your medium based on what you actually have lying around. I’m not a fan of running to a craft store for a specific type of expensive canvas just to start a project. If you have some old magazines, a stack of postcards, or even just some high-quality printer paper, start there. The goal is to use existing resources so you aren’t adding more clutter to your budget.
- 2. Clear a dedicated workspace, but keep it small. You don’t need a studio; a clean section of your dining table or even a desk works fine. Lay down some old newspapers or a cheap drop cloth because nothing ruins a productive afternoon faster than trying to scrub dried glue out of a rental-grade tabletop.
- 3. Curate your visual elements. If you’re doing a collage, don’t just grab random scraps; look for a consistent color palette or a specific mood. I usually aim for something minimalist—maybe some architectural sketches or black-and-white photography. This keeps the final result looking intentional rather than like a high school art project.
- 4. Arrange your pieces before you commit to any adhesive. This is the most important part of the system. Move your cutouts around, overlap them, and step back a few feet to see how they look from a distance. You want to find a composition that works before you make it permanent.
- 5. Apply your adhesive sparingly. Whether you’re using a glue stick, double-sided tape, or mounting putty, less is almost always more. If you use too much, the paper will warp or ripple, and that’s when it starts looking cheap and messy instead of curated.
- 6. Frame the final product using what you’ve got. You don’t need custom framing; a simple, clean black frame from a thrift store or even just a sturdy piece of cardstock can do the trick. The frame acts as the boundary that tells your eye, “this is art,” which instantly elevates the whole look of your space.
- 7. Mount it and move on. Use command strips or small finishing nails to get it on the wall. Once it’s up, don’t overthink it. The point wasn’t to spend ten hours on a masterpiece; it was to improve your environment with a little bit of focused effort.
Budget Friendly Wall Art Projects for High Impact Results
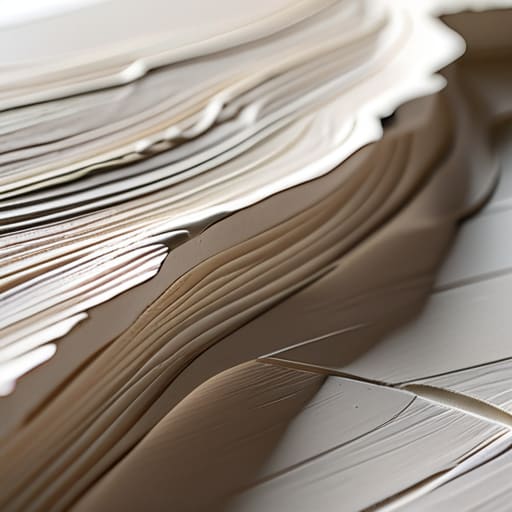
If you’re looking to upgrade your space without a massive trip to a big-box home store, focus on budget friendly wall art projects that lean into texture rather than expensive materials. I’ve found that you don’t need professional-grade oils to make a statement. Instead, grab some cheap acrylics and a tub of joint compound from the hardware store. Using a palette knife to create thick, sweeping ridges on a basic canvas is one of my favorite textured wall art tutorials shortcuts; it looks incredibly high-end and intentional, even if it only took you twenty minutes on a Tuesday night.
Another way to keep costs low is to experiment with mixed media wall art supplies you probably already have lying around. Think dried botanicals, old architectural sketches, or even scraps of heavy-duty fabric. The goal isn’t to create a masterpiece for a gallery, but to build something that feels cohesive with your room. By layering different elements, you add depth that a flat print just can’t match. It’s about creating visual interest through layers, not through the price tag of your supplies.
Modern Home Decor Diy Using Minimal Effort Techniques
If you want that high-end gallery look without the designer price tag, you need to lean into simplicity. Most modern aesthetics rely on texture and scale rather than intricate, time-consuming details. One of my favorite modern home decor DIY shortcuts is playing with depth. Instead of trying to paint a perfect landscape, grab some cheap modeling paste or even a bit of joint compound from the hardware store. By applying it unevenly to a canvas, you can create minimalist, textured pieces that catch the light beautifully. It’s less about being a master painter and more about controlling how shadows hit the surface.
Another way to keep things low-effort is through curation rather than creation. If you aren’t feeling the brushwork, look into mixed media wall art supplies like matte black spray paint or even architectural tracing paper. I often find that framing a single, interesting piece of textured paper or a geometric cutout provides a much cleaner look than a cluttered gallery wall. The goal isn’t to spend five hours on a project; it’s to create a visual focal point that makes your space feel intentional and calm.
Five ways to keep your walls looking intentional (without the stress)
- Stop buying “sets.” One of the biggest mistakes I see is people buying matching, pre-packaged wall art sets that look like they came straight out of a corporate lobby. It kills the character of a room. Instead, pick one large piece you actually love and pair it with two smaller, mismatched items you found at a thrift store or even made yourself. It looks curated, not bought.
- Scale is everything. A tiny frame on a massive, empty wall just looks like an afterthought. If you don’t have the budget for one giant canvas, don’t try to fill the space with a dozen tiny things—it’ll just look cluttered. Go for a “gallery cluster” where you group medium-sized pieces close together to create the illusion of one large, cohesive unit.
- Use what you already own as texture. You don’t always need a frame. I’ve found that hanging a high-quality textile, a vintage map, or even a structured piece of fabric can add more depth to a room than a flat print. It breaks up the hard lines of the furniture and makes the space feel lived-in rather than staged.
- Mind your lighting. You can spend fifty bucks on a piece of art, but if it’s sitting in a dark corner, it’s wasted. If you can’t afford a dedicated picture light, just reposition a floor lamp or use a small, plug-in spotlight. Good lighting makes even a cheap DIY project look like an expensive installation.
- Don’t commit to permanent holes immediately. If you’re testing out a new layout, use painter’s tape to mark the corners of where the frames will go. I do this every time I rearrange my studio. It saves you from the “oops, I drilled a hole in the wrong spot” headache and lets you see if the visual weight actually works before you grab the hammer.
The Bottom Line
At the end of the day, decorating your space shouldn’t feel like a second job or a massive drain on your savings. We’ve looked at how to use simple materials, low-effort modern techniques, and budget-friendly hacks to turn a blank wall into something that actually feels like home. Whether you’re framing vintage sketches or experimenting with minimalist textures, the goal is the same: creating a visual environment that supports your headspace without stealing your entire weekend. It’s about finding those small, repeatable wins that make your apartment feel curated rather than just cluttered.
Don’t get caught up in the trap of thinking you need a designer’s budget or a professional studio to make an impact. Your space is a reflection of your own systems and your own taste, and it’s allowed to evolve as you do. Start small—maybe just one frame or one single piece of textured art—and see how it shifts the energy of the room. You don’t need a perfect, Pinterest-ready showroom; you just need a space that serves your life and makes you feel grounded when you walk through the door. Grab your notebook, pick one project, and just get started.
Frequently Asked Questions
How do I hang these pieces without drilling holes into my walls, especially if I'm renting?
If you’re renting, the last thing you want is a security deposit deduction because of a cluster of drill holes. I swear by Command strips—just make sure you actually clean the wall with rubbing alcohol first so they stick. If the pieces are heavier, look into tension rods or leaning larger frames against the wall for a more intentional, “gallery” look. It’s zero-effort, zero-damage, and keeps your landlord off your back.
What’s the best way to arrange a group of smaller pieces so they don't just look like random clutter?
The trick is to stop treating them like individual items and start treating them like one single unit. I usually use the “anchor” method: pick one slightly larger piece to act as the center of gravity, then build the others around it. Keep the spacing tight—about two to three inches between frames—so your eye sees a cohesive shape rather than a scattered mess. If it feels chaotic, it probably is. Tighten the gaps.
How can I make DIY art look "expensive" rather than like a craft project I did in middle school?
The difference between “craft project” and “curated art” usually comes down to two things: scale and framing. Stop making tiny, cluttered clusters of things. Go big. One large, intentional piece looks much more expensive than five small ones. Also, ditch the cheap plastic frames. Invest in high-quality, oversized mats and solid wood frames. If the edges are messy or the colors are too loud, it looks like a hobby; if it’s minimalist and well-framed, it looks like an investment.