A Beginner’s Guide to Designing and Making Your Own Jewelry
I was sitting on my floor last Tuesday, surrounded by a chaotic mountain of tangled silver wire, tiny bead containers that wouldn’t close, and a pile of expensive tools I barely knew how to use. I had spent three hours trying to replicate a simple pendant I saw online, only to end up with something that looked less like “artisan jewelry” and more like a tangled mess of scrap metal. Most people think diy jewelry making requires a massive studio setup and a mountain of specialized equipment, but honestly? That’s just a recipe for wasted money and a cluttered apartment.
I’m not here to sell you on a complicated hobby that consumes your entire weekend and your entire paycheck. This guide is about building a minimalist toolkit and a repeatable process that actually works. I’m going to show you how to master the basics of diy jewelry making using just a few high-quality essentials, so you can create pieces that actually look intentional without turning your living space into a warehouse. We’re focusing on functional creativity—making things that look great and, more importantly, don’t break the bank.
Table of Contents
Guide Overview
Tools & Supplies
- Needle-nose pliers for gripping and bending wire
- Wire cutters for trimming metal and cord
- Beading mat to prevent rolling beads
- Assorted glass or gemstone beads (1-2 packs)
- Jewelry wire or elastic cord (1 roll)
- Lobster clasps and jump rings (1 set)
Step-by-Step Instructions
- 1. Don’t go out and buy a massive, professional-grade jewelry kit. Most of those pre-packaged sets are filled with cheap, flimsy components you’ll never actually use. Instead, grab a small pair of needle-nose pliers, a wire cutter, and a basic set of bead trays. You only need the essential tools to get started, and keeping your setup minimal means you won’t spend your whole Saturday cleaning up a mess of tiny parts.
- 2. Pick a specific aesthetic before you touch a single bead. If you try to make “everything,” you’ll end up with a drawer full of mismatched junk that doesn’t feel cohesive. I usually stick to a minimalist palette—think matte black beads, brushed silver, or simple earth tones. Having a clear visual direction makes the decision-making process faster and keeps your finished pieces from looking like a craft store explosion.
- 3. Map out your design on a flat surface or a bead board before you string anything. This is the part where most people rush and end up having to unstring everything because the pattern looks off once it’s actually on the wire. Lay your beads out in a straight line to mimic how the piece will actually hang. It takes an extra two minutes, but it saves you the headache of starting over.
- 4. Use high-quality cord or wire for the foundation. There is nothing more frustrating than a beautiful necklace snapping the first time you put it on. Whether you’re using silk thread for pearls or a sturdy nylon cord for beaded bracelets, invest a little more in the structural integrity of your materials. It’s better to spend an extra couple of dollars now than to have to rebuild the entire piece next week.
- 5. Master the basic knot or crimp. If you’re working with beads on a wire, learn how to use a crimp bead properly to secure your ends. If you’re using cord, learn a secure surgeon’s knot. The goal is to make the connection points nearly invisible so the focus stays on the design, not on how the thing is held together.
- 6. Trim the excess and finish the edges. Once your piece is assembled, don’t just hack off the leftover wire and call it a day. Use your pliers to tuck any sharp ends inward or add a small jump ring to cover the seam. A clean finish is the only thing that separates a “homemade” looking trinket from a piece of actual jewelry you’d be proud to wear.
The Bare Minimum Jewelry Making Kit Essentials
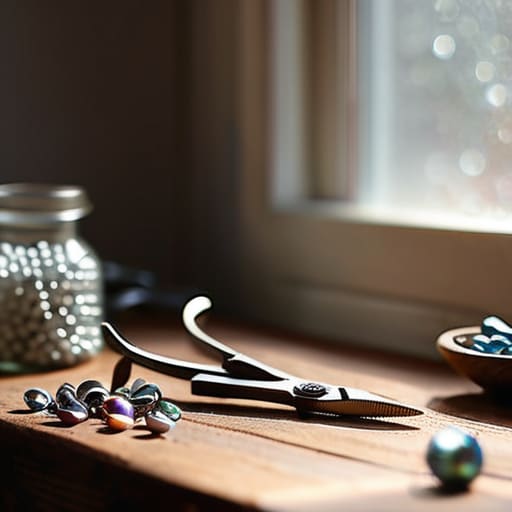
Look, you don’t need a massive, velvet-lined organizer filled with gadgets you’ll use once and then lose under the bed. Most of those “all-in-one” sets are just a way to charge you more for plastic junk. If you want to actually build something that lasts, start with a few high-quality jewelry making tools for beginners that won’t bend the first time you try to crimp a bead. I’m talking about a decent pair of needle-nose pliers, side cutters, and round-nose pliers. If you learn how to use jewelry pliers correctly, you can handle almost any basic project without needing a workshop full of specialized equipment.
Once you have the mechanics down, focus your budget on the components that actually touch your skin. Instead of buying a massive tub of cheap, mismatched beads, pick up some essential bead supplies in a consistent material—like glass or stone—that won’t flake or lose color after three wears. It’s better to have ten beads you actually love than a thousand that look like landfill. Stick to the basics, keep your workspace clear, and don’t let the “hobby creep” drain your bank account before you’ve even finished your first bracelet.
Mastering Jewelry Making Tools for Beginners Without the Clutter
The biggest mistake I see people make is thinking they need a professional studio to start. You don’t. When you’re looking into jewelry making tools for beginners, the goal isn’t to collect every shiny gadget in the catalog; it’s to find the three or four things that actually do the heavy lifting. If you try to buy a twenty-piece set, you’ll end up with a drawer full of specialized cutters you’ll use once and then forget about. Instead, focus on mastering the basics of how to use jewelry pliers—specifically round-nose, chain-nose, and side-cutters. Once you understand how these three interact, you can execute almost any basic design without the mental clutter of a massive toolkit.
I also recommend keeping your workspace modular. Since I work from a small apartment, I can’t have beads spilling across my dining table every time I get a spark of inspiration. Get a small, dedicated tray for your essential bead supplies so you can clear your desk in thirty seconds. This isn’t about being “organized” for the sake of it; it’s about reducing the friction between having an idea and actually making it. If setting up takes too much effort, you won’t do it. Keep the tools accessible, keep the tray contained, and keep the momentum.
How to Keep Your Jewelry Making From Becoming a Second Job
- Stop buying “all-in-one” kits from big-box stores; they’re usually packed with cheap, flimsy components you’ll throw away in a week. Buy your wire and beads in small, high-quality batches so you actually enjoy the tactile experience.
- Design for your current skill level, not your “someday” skill level. If you can only do basic wire wrapping right now, don’t buy a complex bead loom and spend three hours getting frustrated; stick to what works so you actually finish something.
- Set up a single, dedicated “station” even if it’s just a specific tray on your dining table. If you have to hunt for your pliers every single time you want to be creative, you’ll eventually just stop doing it.
- Limit your color palette. One of the fastest ways to make DIY jewelry look expensive rather than “crafty” is to stick to a tight, intentional color story instead of using every random bead in your bin.
- Batch your work to save mental energy. Don’t make one earring, then a necklace, then a ring; spend one hour just cutting wire, then another hour just looping. It keeps you in the flow and prevents that feeling of constant setup and teardown.
Keeping the Momentum Without the Mess
Look, you don’t need a dedicated studio or a massive collection of specialized pliers to get this moving. We’ve covered the essentials: stick to a minimal kit, master the few tools that actually matter, and avoid the trap of buying every shiny new component that hits the market. The goal here isn’t to turn your living room into a cluttered workshop that you’re too stressed to clean up. By focusing on a curated selection of high-quality basics, you ensure that your hobby remains a source of relaxation rather than another item on your mounting to-do list. Keep your workspace small, your tools organized, and your inventory intentional.
At the end of the day, jewelry making should be about the satisfaction of creating something tangible with your own hands. It’s one of those rare ways to actually see the direct result of your effort, whether it’s a simple pair of earrings or a custom necklace. Don’t let the fear of making a mistake stop you from starting; even a “failed” piece is just data for your next attempt. Build your collection one piece at a time, and remember that the best system is the one that actually gets used. Just grab your tools, sit down, and make something that feels like you.
Frequently Asked Questions
How do I stop myself from buying every random bead kit I see on Instagram and actually sticking to a budget?
Stop treating every Instagram ad like a shopping list. Those curated kits are designed to make you feel incomplete, but they’re just clutter in disguise. Instead, pick one specific aesthetic—like minimalist silver or earthy stones—and stick to it. Buy components in bulk only when you have a project in mind. If you can’t name the exact piece you’re making before you hit “checkout,” don’t buy the beads. Control the inventory; don’t let it control you.
Is there a way to make these pieces look professional enough to actually wear, or am I stuck with the "homemade" look?
The “homemade” look usually happens when you overcomplicate things or use flimsy materials. To make your pieces look intentional rather than accidental, focus on consistency. Use high-quality findings—like sterling silver or gold-filled clasps—instead of cheap alloy that turns green. Keep your wire tension even and your crimps clean. If the construction is solid and the materials aren’t trash, it stops looking like a craft project and starts looking like a design choice.
Where can I find high-quality materials that won't turn my skin green after two days of wearing them?
Look, don’t fall for those cheap “mystery metal” assortments on Amazon; they’re just a fast track to itchy skin and wasted cash. If you want pieces that actually last, look for “gold-filled” or “sterling silver” rather than just “gold plated.” I usually hunt through Etsy or specialized sites like Rio Grande. It costs a bit more upfront, but it’s a better system than constantly replacing junk that turns your skin green.

