Build a Functional Compost Bin for Your Backyard
I used to think that if I wanted to compost in a tiny apartment, I’d need a high-tech, expensive countertop machine that looks more like a kitchen appliance than a tool. I spent weeks researching “smart” solutions, only to realize I was just adding another expensive gadget to a life that was already too cluttered. The truth is, you don’t need a specialized system or a backyard to stop throwing money in the trash; you just need to understand how to make a compost bin that actually fits your space and your schedule. Most people overcomplicate this because they think they need to be farmers, but you really just need a functional system that works in the background.
In this guide, I’m skipping the fluff and the “eco-warrior” pretension. I’m going to show you how to build a low-maintenance, small-scale bin using stuff you probably already have in your utility closet or under your sink. We’ll focus on a setup that prevents smells and won’t take over your kitchen, giving you a repeatable win for your budget and your environment without adding more chores to your plate.
Table of Contents
Guide Overview
Tools & Supplies
- Drill with bits for making ventilation holes
- Handsaw for cutting wood or plastic if needed
- Measuring tape for precise dimensions
- 4 Wood pallets or a large plastic bin
- Screws or heavy-duty wire to secure structure
- Hardware cloth or wire mesh for lining
- Drill bits for aeration holes
Step-by-Step Instructions
- 1. First, you need to pick your vessel. Since most of us aren’t working with sprawling backyards, grab a standard plastic storage bin—the kind you’d use to organize your closet. Make sure it has a lid to keep things contained and prevent fruit flies from turning your kitchen into a nightclub.
- 2. Grab a drill and some hardware. You’re going to need to create airflow, or else your compost will turn into a stinky, anaerobic mess. Drill small holes every few inches along the sides and the lid of the bin. If you don’t have a drill, a heated screwdriver works, but don’t skip this step or you’ll regret it later.
- 3. Set up the base layer. You don’t want your scraps sitting in a pool of liquid at the bottom. Layer about two inches of shredded cardboard or dry leaves at the very bottom. This acts as a buffer and helps manage moisture so your bin stays breathable and functional.
- 4. Start the “Green and Brown” cycle. This is the only part you actually need to memorize: Greens are your nitrogen-rich scraps (coffee grounds, veggie peels, eggshells) and Browns are your carbon-rich materials (dried leaves, shredded paper, cardboard). Aim for a ratio that is roughly two parts brown to one part green. If it smells bad, you have too many greens; if nothing is happening, you need more nitrogen.
- 5. Keep it damp, not soaked. Your compost should feel like a wrung-out sponge. If it’s bone dry, the microbes can’t do their job; if it’s dripping wet, it’ll start to smell like a landfill. Use a spray bottle if you need to add a little moisture to the mix.
- 6. Give it a quick stir once a week. You don’t need to spend an hour every Sunday doing this, but grab a small hand shovel or even a sturdy stick and turn the pile over. This introduces oxygen back into the center, which keeps the decomposition process moving at a steady, efficient pace.
- 7. Harvest your “black gold.” Once the material at the bottom looks like dark, crumbly soil and you can’t recognize what the original scraps were, it’s ready. Scoop it out and use it for your houseplants or balcony garden. It’s the most effective way to recycle your kitchen waste without needing a massive plot of land.
The Minimalist Compost Bin Materials List for Busy People
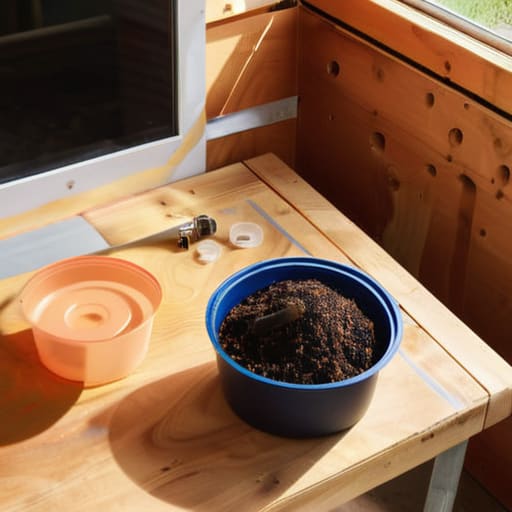
Look, you don’t need a specialized kit from a high-end garden center to get this moving. When I’m putting together a compost bin materials list, I focus on things I likely already have in my utility closet or can grab at a hardware store for under ten bucks. A simple plastic storage bin with a lid is my go-to. The key isn’t the price tag; it’s ensuring you have a drill handy to create small holes. Without those holes, you’re just creating a stagnant mess instead of facilitating the organic waste decomposition process.
If you’re tight on space, don’t sweat the scale. You don’t need massive compost bin dimensions for a backyard if you’re working with a balcony or a small patio. A five-gallon bucket or a small under-sink bin works just as well for a single person. Just remember: airflow is everything. If you don’t prioritize aeration for compost bins by drilling enough holes, you’ll end up with a smell that makes your neighbors very unhappy. Keep it simple, keep it breathable, and keep it functional.
Choosing Your Best Location for Compost Bin Success
Where you put this bin is just as important as what you put in it. If you’re working with a small backyard, you don’t need a massive, eyesore setup; just focus on finding a spot that stays relatively shaded. Direct, midday sun can bake the moisture right out of your pile, which effectively kills the organic waste decomposition process before it even gets started. I usually look for a corner that gets a bit of dappled light—enough to keep things warm, but not so much that you’re constantly playing nursemaid to a dried-out bin.
If you’re stuck in an apartment, your “location” is likely a corner of your balcony or a spot under the sink. In those tight quarters, airflow is your best friend. You want a spot that allows for easy aeration for compost bins without making your living space feel cluttered or smelling like a landfill. Ideally, pick a place that is convenient enough to reach every single day. If the bin is tucked so far away that you have to trek through the house to use it, you’re going to stop using it within a week. Keep it close, keep it accessible, and keep it simple.
Five ways to keep your bin from becoming a headache
- Don’t go overboard on the greens. Too many food scraps at once turns your bin into a soggy, stinky mess; aim for a balance of nitrogen-rich scraps and carbon-heavy browns like shredded cardboard.
- Keep a small container on your counter for daily scraps. If you have to walk to the bin every time you peel a carrot, you won’t do it, and that’s how food waste starts piling up in your trash.
- Airflow is non-negotiable. If your bin is packed too tight, it’ll start smelling like a swamp; give it some breathing room or stir it occasionally to keep the process moving.
- Manage the moisture like you’re watering a plant, not a flood. It should feel like a wrung-out sponge—damp, but never dripping.
- Avoid the “forbidden” foods. Keep meat, dairy, and oily scraps out of your bin entirely; they’re a fast track to attracting pests and making your apartment smell like a landfill.
Keeping the Momentum
At the end of the day, you don’t need a complex, industrial-grade setup to make this work. We’ve covered the essentials: picking a bin that actually fits your space, grabbing the right low-maintenance materials, and finding a spot that won’t become a nuisance. The goal here isn’t perfection or a science experiment; it’s about creating a repeatable system that turns your kitchen scraps into something useful instead of just adding to a landfill. If you keep your ratios balanced and your bin in the right spot, the biology does most of the heavy lifting for you. Just remember to stay consistent with your scraps, and the system will take care of itself.
I know it feels like just one more thing on an already overflowing to-do list, but composting is one of those rare wins that actually pays dividends. You’re saving money on soil, reducing your trash footprint, and reclaiming a bit of control over your environment. It’s about proving that you don’t need a backyard or a massive budget to live a more intentional, sustainable life. Start small, don’t overthink the process, and just focus on the system. Once you see that first batch of rich, dark soil, you’ll realize that these small, intentional shifts are exactly how we build a life that actually works for us.
Frequently Asked Questions
How do I stop the bin from smelling like a garbage dump in a small apartment?
The smell usually means one thing: too much moisture and not enough air. If it’s stinking up your kitchen, you’ve likely thrown in too many “green” scraps (like fruit peels) without enough “browns” (like shredded cardboard or paper). Balance the ratio. Also, keep a handful of dry sawdust or torn-up egg cartons nearby to toss in every time you add food. It absorbs the excess liquid and keeps the funk at bay.
What exactly can I actually throw in there without ruining the whole system?
Keep it simple: think greens and browns. Greens are your nitrogen—scraps like fruit peels, veggie ends, and coffee grounds. Browns are your carbon—dried leaves, shredded cardboard, or even that egg carton you were about to toss. The golden rule? Don’t throw in meat, dairy, or oily leftovers. They’ll make your bin smell like a landfill and attract pests. Stick to the basics, keep the balance right, and let the system do the work.
How often do I actually need to mess with this thing to keep it working?
Look, I didn’t build this system to add another chore to your plate. If you’ve set it up right, you shouldn’t be “working” on it daily. Aim for a quick check-in once a week—just a stir to keep air moving and a sniff to make sure it doesn’t smell. If it’s too dry, add some moisture; if it’s too wet, toss in some shredded paper. That’s it. Keep it low-maintenance.

