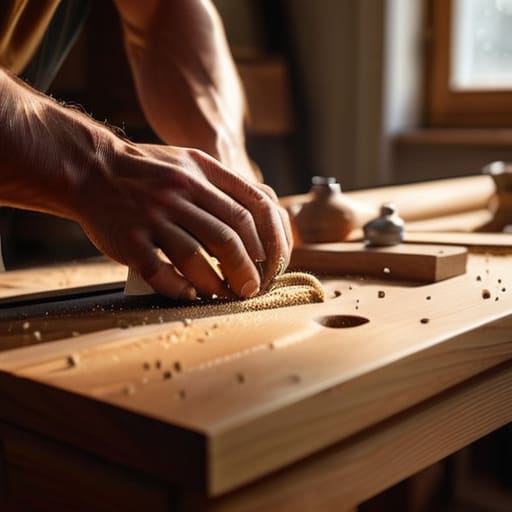
Build Your Own Custom Bookshelf From the Ground Up
I spent my childhood watching my mom try to wedge heavy textbooks into those flimsy, particle-board units you buy for fifty bucks. They always ended up bowing in the middle or collapsing entirely, turning a small apartment into a cluttered mess of fallen paperbacks and broken dreams. Most people think that learning how to build a bookshelf requires a massive workshop or a degree in carpentry, but that’s a lie designed to sell you expensive power tools you’ll never use. You don’t need a masterclass; you just need a logical system and a few basic materials that won’t fail you when you actually start loading them up.
In this guide, I’m stripping away the unnecessary fluff and the “pro-level” complexity that keeps most people from even starting. I’ll show you a straightforward method to build a sturdy, minimalist unit that actually fits your specific space and budget. We’re going to focus on repeatable wins: clean lines, structural integrity, and a process that doesn’t eat up your entire Saturday. Let’s get your books off the floor and into a system that actually works.
Table of Contents
Guide Overview
Tools & Supplies
- Circular saw or hand saw for cutting wood to size
- Power drill for driving screws and pilot holes
- Sandpaper for smoothing rough edges
- Measuring tape for accurate dimensions
- 1×4 or 2×4 lumber (approx. 4-5 boards)
- Wood screws (1 box of 1.25 or 2-inch)
- Wood glue for reinforcing joints
- Wood stain or paint for finishing
Step-by-Step Instructions
- 1. First, don’t just run to the hardware store and grab whatever wood looks cheapest. You’ll end up with warped boards that make the whole project a headache. Go to a local lumber yard or a big-box store and pick out pre-cut pine or birch plywood that is already sanded smooth. I usually grab 3/4-inch thickness because it’s sturdy enough to hold heavy books without bowing under the weight over time.
- 2. Lay everything out on the floor of your apartment before you even touch a screwdriver. I like to use my small notebook to sketch the dimensions one last time to make sure the vertical supports won’t block your walking path. Once you’re happy with the footprint, mark your cut lines—if you aren’t cutting the wood yourself, have the store do it so you can work with precision right at your kitchen table.
- 3. Grab a drill and some wood glue, and it’s time to connect the frame. Apply a thin, even bead of glue along the edges of your shelves before you join them to the side panels. The glue is what actually holds the structure together long-term; the screws are really just there to act as clamps while the glue sets. Don’t skip this, or your bookshelf will start wobbling after a month.
- 4. Drive your screws in, but do it slowly. If you rush, you’ll strip the wood or the screw head, and then you’re stuck with a mess. I always use a countersink bit first to create a tiny little divot for the screw head to sit in. This ensures the hardware stays flush with the wood, giving you that clean, minimalist look I’m always chasing.
- 5. Once the frame is solid, you need to address the back. A lot of people skip the backing because it feels extra, but a thin sheet of plywood on the back is what prevents the unit from racking (that’s the leaning, sideways movement). Nail it in place with small finishing nails every six inches. It makes the whole thing feel solid and professional rather than flimsy.
- 6. Give the whole thing a quick sand with a fine-grit sandpaper to get rid of any splinters or rough patches. If you want to go the extra mile, apply a simple matte sealer. I prefer a clear coat because it lets the natural grain of the wood do the talking without adding unnecessary visual clutter to your room.
- 7. Finally, get it against the wall and check if it’s level. If your floors are uneven—and let’s be real, most apartment floors are—use a few small shims under the base to steady it. Once it’s stable, anchor it to the wall using a simple L-bracket. It’s a small step that keeps your gear safe and gives you the peace of mind to actually enjoy your new setup.
Smart Custom Shelving Unit Plans for Busy People
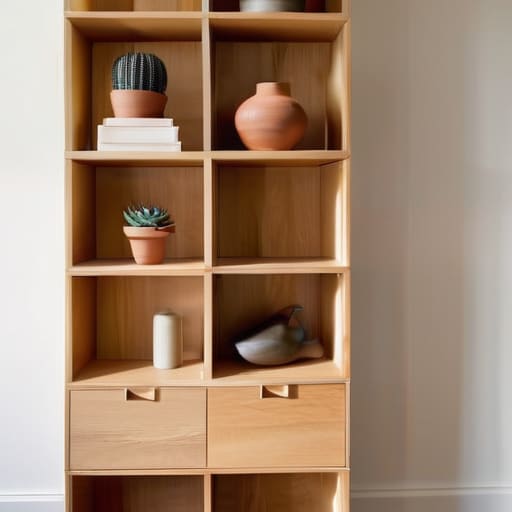
If you aren’t looking to build a massive library, don’t feel pressured to follow a complex blueprint. I’ve found that the best custom shelving unit plans are actually the ones that embrace simplicity. Instead of trying to replicate a high-end showroom piece, aim for a modular approach. Think about building smaller, stackable units that can grow with your space. This way, if you move to a new apartment next year, you aren’t stuck trying to dismantle a giant, heavy structure.
The real secret to making these smaller units look intentional rather than “cheap” comes down to the details. When you’re working with measuring and cutting lumber, take an extra ten minutes to double-check your math. Precision at the start saves you from a headache during the wood glue and screw assembly phase. If you want a more polished look without the professional price tag, focus on finishing wood with stain or paint once the structure is solid. A clean, matte finish can make even the most basic pine boards look like something you’d find in a curated boutique.
Essential Woodworking Tools for Beginners and Minimalist Makers
Look, you don’t need a garage full of expensive machinery to get this done. I’ve spent enough time fixing up old furniture to know that most people overspend on gear they’ll only use once. When you’re looking for woodworking tools for beginners, focus on the essentials that actually move the needle: a reliable drill, a circular saw, and a decent tape measure. If you try to skimp on the measuring part, you’re going to spend your entire Saturday fixing mistakes instead of enjoying your new setup.
Precision matters, especially when you’re measuring and cutting lumber for a project that needs to hold weight. A single millimeter off at the start can turn a clean design into a wobbly mess. Once the pieces are cut, don’t skip the basics of wood glue and screw assembly. The glue is what actually creates the structural integrity, while the screws just act as temporary clamps while things dry. It’s a small, repeatable step that ensures your shelf stays level and doesn’t sag under the weight of your books a month from now.
Five ways to keep this project from becoming a headache
- Measure twice, cut once, and then measure a third time. I’ve learned the hard way that being “mostly sure” about a measurement is just a fast track to a pile of expensive scrap wood.
- Don’t aim for perfection; aim for stability. If the shelf is solid and doesn’t wobble when you load it with books, you’ve already won. A tiny gap in a joint isn’t a failure; it’s character.
- Invest in decent wood glue and clamps. You can get away with basic tools, but cheap glue is a gamble you don’t want to take when you’re trying to keep your apartment looking intentional rather than DIY-disaster.
- Plan for weight distribution. If you’re planning on storing heavy hardcovers, don’t go overboard with wide, unsupported spans. You’ll end up with a “smiley face” shelf that bows in the middle within a month.
- Think about the finish before you start cutting. It’s much easier to decide if you want a matte stain or a simple clear coat now, rather than halfway through a project when you’re tired and just want to be done.
The Finished Product
At the end of the day, building this bookshelf isn’t about mastering fine carpentry or owning a workshop full of expensive machinery. It’s about the fact that you took a few basic tools, followed a logical plan, and created something that actually serves your space. We covered the essential tools, the smart planning methods to save you time, and the specific steps to get the structure standing. You don’t need a perfect, museum-quality piece of furniture to make an impact; you just need a functional system that holds your books and clears the clutter off your floor.
Once the dust settles and you’ve wiped down the wood, take a second to actually look at what you made. There is a specific kind of quiet satisfaction in knowing that your environment is shaped by your own hands rather than just being a collection of things you bought because they were on sale. Don’t get hung up on a slightly uneven edge or a visible screw—those are just marks of a project that actually happened. Focus on the fact that you’ve reclaimed a piece of your home and built something lasting. Now, go grab your books, fill those shelves, and get back to living your life.
Frequently Asked Questions
How do I make sure the shelves don't sag over time if I'm planning to store heavy books?
If you’re loading these with heavy hardcovers, don’t just wing it. The biggest mistake is going too wide with the spans. Keep your shelf width under 30 inches if you’re using standard pine or plywood; any wider and gravity will win. If you need longer spans, add a solid wood “cleat” or a strip of hardwood along the front edge. It acts like a spine, adding much-needed structural rigidity without a massive footprint.
Is there a way to make this look high-end without spending a fortune on expensive hardwoods?
You don’t need walnut or oak to make a piece of furniture look intentional. The secret is in the finish and the edges. Use high-quality birch plywood—it’s sturdy and looks great if you leave the edges exposed and sand them smooth. Then, hit it with a matte furniture wax or a dark wood stain. It hides the “cheap” grain and gives it that heavy, designer feel without the designer price tag.
What’s the easiest way to anchor this to the wall so it doesn't tip over, especially in a small apartment?
Since you’re in a small apartment, you probably can’t go drilling into every stud. The easiest, most reliable way is using L-brackets and some heavy-duty drywall anchors. Don’t skimp here—get the screw-in kind, not the plastic plug ones that just pop out. Find where the shelf meets the wall, screw the bracket into the shelf, and drive the anchor into the drywall. It’s a five-minute job that keeps the whole thing from crushing your toes.

