Get a Clean Caulk Job Without the Typical Mess
I was staring at a growing patch of black mold behind my kitchen sink, clutching a cheap screwdriver and wondering why my landlord wouldn’t just fix it. That was my first real lesson in apartment survival: if you wait for someone else to maintain your space, you’re just inviting decay. I spent three hours that afternoon watching YouTube tutorials that made it look like an art form, only to end up with a smeared, grey mess that looked worse than the leak itself. Most people think you need a professional toolkit or a steady hand of a surgeon to learn how to caulk, but honestly? Most of those “expert” guides are just overcomplicating a very simple, mechanical task.
I’m not here to teach you how to turn your bathroom into a masterpiece; I’m here to help you stop wasting money on repairs that could have been handled in twenty minutes. This guide is about the bare minimum tools and the exact, repeatable movements you need to seal those gaps properly so you can get back to your actual life. We’re going to skip the fluff and focus on a system that works, ensuring your apartment stays dry and your bank account stays intact.
Table of Contents
Guide Overview
Tools & Supplies
- Caulking gun for applying sealant
- Caulk removal tool or utility knife for scraping old material
- Paper towels for cleanup
- Tube of caulk (silicone or acrylic)
- Painter's tape for clean lines
Step-by-Step Instructions
- 1. First, you have to clear out the old mess. If there’s crusty, peeling caulk already there, don’t try to layer new stuff on top—it’ll just fail in a month. Use a putty knife or a dedicated caulk removal tool to scrape the old stuff out. I usually keep a small utility knife handy for the stubborn bits, but be careful not to gouge the tub or the tile while you’re doing it.
- 2. Once the gap is empty, it needs to be bone dry and clean. Grab a rag with some rubbing alcohol and wipe down the entire area. If there’s any soap scum or moisture trapped in the cracks, the new caulk won’t stick, and you’ll be doing this all over again next season. It’s a tedious ten minutes, but it’s the difference between a permanent fix and a total waste of money.
- 3. Grab your caulk gun and your tube. If you’re working in a bathroom, make sure you bought “100% Silicone”—it’s waterproof and won’t grow mold as fast as the cheap stuff. Before you start, cut the tip of the tube at a slight 45-degree angle. Don’t cut it too wide; you want a controlled bead, not a massive, uncontrollable mess that looks like a toothpaste accident.
- 4. This is where people usually panic, but just take a breath. Hold the gun at an angle and pull it toward you in one steady, continuous motion. Don’t stop and start mid-way through a line, or you’ll end up with ugly bumps. Think of it like drawing a single, smooth line with a pen—keep your hand moving and don’t overthink the pressure.
- 5. Now, for the “smoothing” part that actually makes it look professional. Dip your finger in a little bit of soapy water (seriously, just a drop of dish soap works) and lightly run it along the bead you just laid down. The soap prevents the caulk from sticking to your skin and helps you shape the seam perfectly. Do this immediately while the caulk is still wet; once it starts to skin over, you’re stuck.
- 6. Finally, just walk away. The biggest mistake is hovering over it or trying to “fix” a tiny imperfection five minutes later. Most silicone needs at least 24 hours to fully cure before you can get it wet. Put your tools away, grab your notebook, and let the system do its job. Your only job now is to not touch it.
Removing Old Caulk Without Wasting Your Entire Saturday
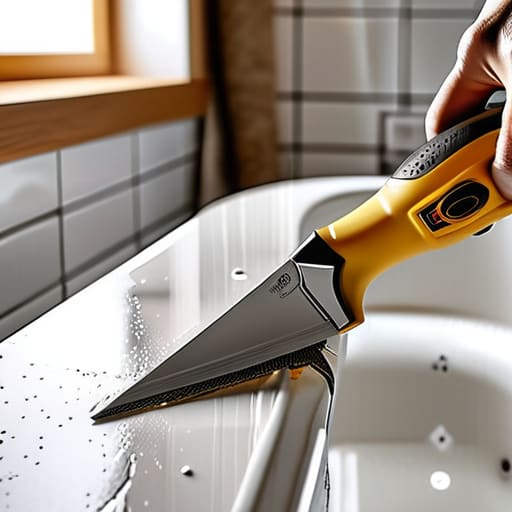
The biggest mistake people make is trying to scrape everything away with a kitchen knife or a screwdriver. It’s a recipe for scratched tile and a wasted afternoon. Instead, grab a dedicated caulk removal tool or a utility knife with a fresh blade. You want to slice along the edges of the existing bead to break the seal, then pull the strips out in long pieces. If you’re removing old caulk from a bathtub or sink, don’t fight the stubborn bits with brute force; use a hair dryer to soften the material first. It takes an extra five minutes, but it saves your joints and your sanity.
Once the bulk is gone, the real work is cleaning the residue. If you leave even a thin film of the old stuff behind, your new layer won’t stick, and you’ll be back here in three months. Use a plastic scraper for the heavy lifting, then hit the area with a bit of rubbing alcohol on a rag to strip away any lingering oils. This step is non-negotiable for preventing water damage later on. Get it clean, get it dry, and then you can actually move on with your day.
Choosing Between Silicone vs Acrylic Caulk for Long Term Wins
Most people grab whatever tube is cheapest at the hardware store, but that’s a mistake that usually ends with you removing old caulk again in six months. If you’re caulking bathroom fixtures where water is constantly sitting—like around your tub or shower—you need silicone. It’s waterproof, flexible, and won’t crack when the house shifts slightly. It’s a bit more annoying to work with because it’s stickier, but it’s the only way to actually succeed at preventing water damage in the long run.
Acrylic is your “low-stakes” option. It’s much easier to clean up with a damp rag and works fine for baseboards or areas that stay dry. The downside? It’s brittle. If you use it in a high-moisture zone, it’ll eventually peel or crack, forcing you to redo the whole job. My rule of thumb is simple: if it gets wet, go silicone. If it’s just for aesthetics in a dry corner, acrylic is fine. It’s about choosing the right tool for the job so you only have to do this once.
Five Ways to Not Mess This Up
- Don’t skip the painter’s tape. If you aren’t confident in your hand stability, run two strips of tape along the edges of the gap first. It gives you a clean line and means you won’t spend an hour trying to wipe away a smeary mess.
- Use a wet finger, but keep it clean. Once the bead is down, dip your finger in a little soapy water and lightly run it along the line to smooth it out. It’s the fastest way to get that professional look without buying expensive smoothing tools.
- Check your drying time before you jump in the shower. I’ve seen too many people apply caulk and then blast it with hot water two hours later, effectively washing their hard work down the drain. Give it the full 24 hours.
- Clean the surface with rubbing alcohol first. If there’s any lingering soap scum or oils on the tile, the new caulk isn’t going to bond—it’s just going to peel off in a week, and then you’re back to square one.
- Buy a cheap caulk gun, not the cheapest one in the aisle. The $2 plastic ones are a nightmare to squeeze and usually result in a jagged, uneven bead. Spend the extra five bucks on a decent metal one so your hands don’t cramp up halfway through.
The Finish Line
Look, at the end of the day, caulking isn’t some grand architectural feat; it’s just about closing the gaps before they turn into expensive problems. You’ve stripped the old junk away, you picked the right material—silicone for the wet zones, acrylic for the dry ones—and you’ve laid down a bead that actually looks clean. The goal wasn’t to spend your entire weekend staring at a bathroom sink, but to execute a targeted intervention that stops water from rotting your subfloor. If you followed the steps, you’ve just saved yourself a massive repair bill and a headache down the road. It’s a small, repeatable win that keeps your space functioning exactly how it should.
I know it feels tedious when you’re mid-project, standing there with a messy tube of sealant and a damp rag, but these are the small systems that actually matter. We spend so much time chasing “big wins” that we forget how much mental energy is drained by a home that feels slightly broken or neglected. Taking an hour to fix these little things is how you reclaim your environment. You aren’t just sealing a tub; you’re maintaining the foundation of your daily life so you can focus your energy on things that actually matter to you. Now, clean up your tools, put the notebook away, and go enjoy the rest of your day.
Frequently Asked Questions
How do I know if I actually need to recaulk or if I can just patch the small spots?
Look, don’t overthink it, but don’t ignore it either. If it’s just a tiny crack or a spot where the seal looks a bit thin, a small patch will buy you some time. But if the caulk is pulling away from the wall, turning black with mold, or feels brittle like old plastic, patching is a waste of money. In those cases, strip it. Patching a failing seal is just delaying a bigger, more expensive headache.
What's the deal with the "caulk gun" – do I really need a fancy one or is the cheap plastic version fine?
Look, don’t overthink it. If you’re just patching one gap in the kitchen, the $5 plastic thing from the hardware store is fine. But if you’re doing a whole bathroom, get a decent metal one. The cheap ones have terrible tension control, meaning you’ll end up with a huge, messy blob that you’ll spend more time cleaning up than actually caulking. Buy a mid-range metal gun once; it’ll save you a massive headache.
Is there a trick to smoothing the bead so it doesn't look like a total mess when I'm done?
The “pro” secret is actually just a spray bottle with soapy water. Once you lay the bead, lightly mist it with a mix of water and a drop of dish soap. It prevents the caulk from sticking to your finger and makes it glide like butter. Use a wet finger or a cheap silicone tool to smooth it in one continuous motion. Don’t overthink it—just one pass and move on.

