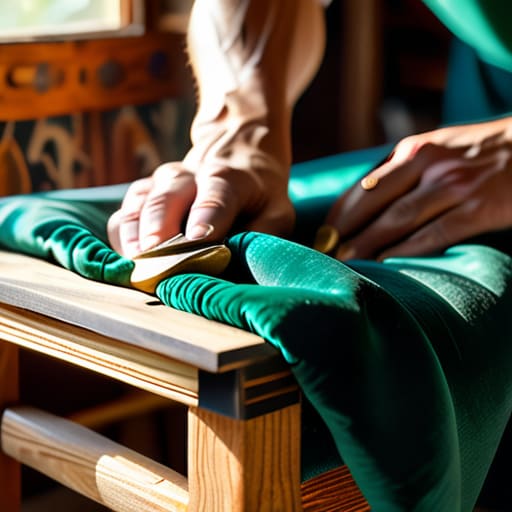
Give Your Old Chair a Makeover Through Reupholstery
I was sitting on the floor of my first studio apartment, staring at a thrifted mid-century armchair that had seen better decades, wondering if I should just toss it on the curb. Most DIY tutorials make you feel like you need a professional upholstery studio and a massive budget just to fix a single seat, but that’s a lie. Learning how to reupholster a chair isn’t about becoming a master craftsman overnight; it’s about realizing that a few staples and some decent fabric can save a piece of furniture from a landfill. I learned early on, growing up in a house where we fixed everything instead of replacing it, that utility beats consumerism every single time.
I’m not going to give you a twenty-step process that eats up your entire Saturday or requires tools you don’t own. Instead, I’m breaking this down into a streamlined system that focuses on the only things that actually matter: structural integrity and a clean finish. We’re going to cover the essential tools, the specific way to pull fabric so it doesn’t look saggy, and how to avoid the expensive mistakes that turn a quick project into a total headache. Let’s get your space looking sharp without breaking your bank account.
Table of Contents
Guide Overview
Tools & Supplies
- Staple gun and staples for securing fabric
- Upholstery pliers for pulling fabric tight
- Scissors for cutting material
- Screwdriver for removing seat components
- Measuring tape for calculating fabric needs
- Upholstery fabric (1-3 yards depending on chair size)
- High-density foam (1 piece)
- Batting/Dacron (1 roll or sheet)
- Dust cover fabric/Cambric (1 yard)
Step-by-Step Instructions
- 1. First, strip the chair down to its bones. Use a pair of pliers to pull out every single old staple and nail. Don’t worry about being delicate here; you need a completely clean surface before you even think about touching new fabric. While you’re at it, check the wooden frame for any wobbles or loose joints. If it’s shaky, now is the time to hit it with some wood glue and a clamp, because a sturdy frame is the only way this project actually lasts.
- 2. Take a “map” of your old materials. Before you toss the old fabric in the trash, lay it out and use your new fabric to trace the shapes. I use a piece of chalk or a marking pen to draw around the existing pieces, adding about two inches of extra room on all sides for the wrap. If you skip this, you’ll end up with fabric that’s too tight to pull around the corners, and that’s a headache you don’t need.
- 3. Prep your padding. Most cheap furniture uses low-grade foam that’s probably compressed or crumbling by now. I usually replace it with a fresh layer of high-density foam or even some batting to give it that structured, high-end feel. Lay your new foam down first, then layer your batting over it to smooth out any sharp edges or lumps. This is the secret to making a $10 thrift store find look like a piece of designer furniture.
- 4. Start the pull. This is where people usually get impatient and mess up. Place your fabric over the seat, pull it tight—but not “guitar string” tight—and secure it with one staple in the center of each side. You want to create a balanced tension so the fabric doesn’t bunch up or ripple when you move to the corners. Work your way from the center out to the edges, keeping the tension even as you go.
- 5. Master the corners. This is the part that separates a DIY disaster from a professional finish. Don’t just bunch the fabric into a messy knot; instead, fold the excess material into neat, flat pleats. Think of it like wrapping a gift. Once you have those folds tucked in, staple them down firmly. If you do this right, the corners will look intentional and clean rather than like a laundry pile.
- 6. The final sweep. Go over the entire underside of the chair and pull out any stray threads or bits of old foam that might have escaped. If you have a staple gun, make sure the staples are driven in straight and flush. Once you’ve checked the tension one last time, you’re done. You’ve just saved a piece of furniture and a chunk of change without spending your entire Saturday on it.
Smart Fabric Selection for Chairs and Essential Supplies

Before you even touch a staple gun, you need to get your materials right. I’ve learned the hard way that picking the wrong textile is a recipe for a wasted Saturday. When it comes to fabric selection for chairs, don’t just buy something because it looks good on a mood board. If it’s a high-traffic dining chair, you need something with a high Martindale rub count—basically, something that won’t pill or thin out after three months of use. Stick to heavy canvases, velvets, or tight weaves. Avoid anything too thin or stretchy; if the fabric moves too much, you’ll be fighting it every step of the way.
As for the gear, don’t go overboard buying a professional workshop’s worth of upholstery tools and supplies. You really only need a decent manual staple gun, a pair of heavy-duty shears, and maybe a tack remover. If the chair feels particularly saggy, don’t skip the upholstery foam replacement. Swapping out old, compressed foam for a fresh layer is the difference between a chair that feels like a luxury find and one that feels like a piece of junk.
Mastering Removing Old Upholstery Fabric and Foam Replacement
Before you even touch your new fabric, you need to strip the chair down to its bones. When removing old upholstery fabric, don’t just rip everything off in a frantic mess. I’ve learned the hard way that those old staples hold the “map” of how the chair was originally built. Use a pair of pliers or a dedicated staple remover to pull the old material away carefully. If the seat feels saggy or the original padding is crumbling into dust, this is your moment for upholstery foam replacement. Don’t skimp here; a fresh, high-density foam layer is the difference between a chair that feels premium and one that feels like sitting on a brick.
Once the frame is clean, you need to address the structural foundation. If the seat feels like a trampoline, you should look into how to use webbing for seating to create a taut, supportive base before adding the new foam. It’s a bit of extra work upfront, but it prevents that annoying “slump” six months down the line. When you eventually move to the stapling phase, remember that tension is everything—pull the fabric tight, but don’t fight it.
Five ways to keep this from becoming a disaster
- Don’t throw away the old fabric until the new piece is actually on the chair. I’ve seen too many people toss their old scraps only to realize they didn’t account for a weird corner or a hidden seam. Use the old stuff as a literal template.
- Invest in a real staple gun, not the cheap plastic ones from the dollar store. You’ll spend more time fighting the tool than actually working if you buy low-quality hardware. A heavy-duty one saves your hands and your sanity.
- Work in small increments. If you try to pull the fabric tight across the whole back at once, you’re going to end up with massive, ugly wrinkles. Do the center first, then work your way out to the corners in small, controlled pulls.
- Keep your workspace clear of everything except the chair and your tools. This isn’t a project for a cluttered floor. If you’re tripping over boxes while trying to tension fabric, you’re going to make a mistake that ruins a $40 yard of linen.
- Always pull the fabric taut, but don’t overstretch it to the point of distortion. You want it tight enough to look professional, but if you pull too hard, you’ll warp the shape of the chair or create weird tension lines that make the whole thing look amateur.
The Finished Product
At the end of the day, reupholstering a chair isn’t about achieving some impossible level of professional perfection; it’s about the systematic execution of a few basic steps. You’ve selected the right fabric, swapped out the old foam, and managed the tension of the staples without losing your mind. If you followed the process, you now have a piece of furniture that actually fits your aesthetic and your budget. Remember, the goal wasn’t to spend forty hours on a single task, but to execute a functional upgrade that keeps your space looking intentional rather than cluttered with cheap, disposable replacements.
There is a specific kind of quiet satisfaction that comes from looking at something in your apartment and knowing you maintained it yourself. We live in a world that tells us if something is broken or outdated, we should just click “buy now” on a new one. I disagree. By taking the time to fix what you already own, you’re building a life that is resilient and curated on your own terms. Don’t let the fear of a messy living room stop you from trying; once you realize how little effort it actually takes to refresh your environment, you’ll stop settling for “good enough” and start building a home that actually works for you.
Frequently Asked Questions
I don't have a professional staple gun; can I actually get away with using a manual one from a hardware store?
Look, you don’t need a heavy-duty pneumatic compressor to pull this off. A basic manual staple gun from the hardware store works just fine, provided you aren’t trying to tackle a massive, heavy-duty armchair. For a standard dining chair or a small accent seat, a manual one is plenty. Just get one with a decent grip so your hand doesn’t cramp halfway through, and make sure you buy the right staple size before you start.
How do I know if the chair frame is actually worth saving or if it's too structurally damaged to bother with?
Before you get too deep into the fabric, do a quick stress test. Sit in it. If you hear loud cracking or feel the frame shifting side-to-side, it’s probably toast. Check the joints: if the glue is dried out or the screws are stripped, you might be able to fix it, but if the wood itself is splintered or rotted, walk away. Don’t waste your time and money trying to resurrect a skeleton that’s already dead.
Is it worth paying for a professional to do the foam, or can I really just buy a cheap replacement online and make it work?
Honestly? Don’t pay a professional unless it’s a high-end antique you’re trying to preserve for resale. For a standard dining or accent chair, paying for labor is a waste of money. Just grab a high-density foam slab online. It’s cheap and easy. My rule is: if the chair is just for your daily life, don’t overcomplicate it. Buy the foam, cut it to fit, and move on with your day.

