How to Build a Raised Garden Bed From Scratch
You don’t need a massive backyard or a professional-grade workshop to start growing your own food. I used to think that learning how to build a raised garden bed meant investing hundreds of dollars in cedar planks and specialized power tools just to keep a few tomato plants alive. But after growing up in a cramped apartment where space was a luxury, I learned that efficiency beats excess every single time. You don’t need a weekend-long construction project; you just need a few sturdy boards, some basic screws, and a plan that doesn’t leave you exhausted before the first seed even hits the dirt.
In this guide, I’m stripping away the unnecessary fluff and the expensive “must-have” gear lists that most gardening blogs try to sell you. I’ll show you the most direct way to tackle how to build a raised garden bed using minimal tools and a focus on long-term durability. We’re going to focus on a system that stays organized, manages soil quality without constant intervention, and—most importantly—actually fits into your existing schedule. Let’s get your setup built so you can get back to the part that actually matters: eating what you grow.
Table of Contents
Guide Overview
Tools & Supplies
- Drill/Driver for assembling wood
- Measuring tape for accurate cuts
- Level to ensure even ground
- Handsaw or miter saw for sizing lumber
- Untreated cedar or redwood boards (4-6 pieces)
- Galvanized screws (1 box)
- Garden soil/compost mix (enough to fill volume)
- Landscape fabric (to prevent weeds)
Step-by-Step Instructions
- 1. First, pick your spot and grab your materials. Don’t go overboard with expensive cedar if you’re on a budget; basic, untreated lumber works fine if you’re just starting out. I usually aim for a 4×4 foot footprint because it’s easy to reach the middle without stepping on your soil and compacting it. You’ll need four boards, some heavy-duty exterior screws, and a drill.
- 2. Lay your boards out on a flat patch of ground to make sure everything is square. If you have a measuring tape, use it, but honestly, as long as the corners look even, you’re mostly there. I like to pre-drill my holes because it prevents the wood from splitting under pressure, which is a headache you don’t need when you’re already halfway through a project.
- 3. Drive your screws in to connect the corners. If you want a bit more stability without a massive time investment, you can screw a small wooden stake into the inside corners. This keeps the structure from bowing outward once the weight of the wet soil starts pushing against the sides. It’s a small, repeatable win for the longevity of the bed.
- 4. Once the frame is standing, clear the area underneath it. You don’t need to dig up the grass, but you should kill it off somehow. I usually just lay down a thick layer of plain brown cardboard over the grass inside the frame. It’s a low-effort way to suppress weeds while eventually decomposing and feeding the soil below.
- 5. Fill the bed with a solid soil mix. Don’t just grab the cheapest dirt from the big-box store; it’s usually mostly sand or clay. Aim for a blend of compost, peat moss, or coconut coir. You want something that holds moisture but actually drains so your plants don’t drown every time it rains.
- 6. Set up a simple irrigation habit. You don’t need a fancy automated system to see results. A simple watering can or a basic hose setup is plenty. The goal here is to build a system that serves your life, so if you can’t commit to watering every single morning, make sure your soil mix is rich enough to hold onto hydration for a little longer.
Choosing the Best Wood for Raised Beds Cedar vs Pressure Treated Lumber
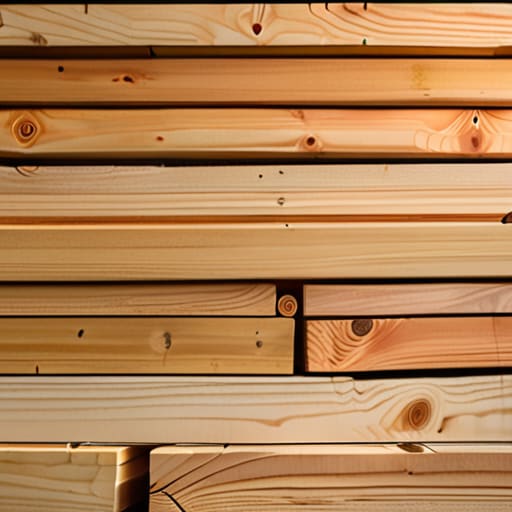
When you’re standing in the lumber aisle, the price tag is usually the first thing that hits you. If you’re on a tight budget, you’ll likely see pressure-treated lumber sitting right next to cedar. The old-school advice was to avoid treated wood because of chemical concerns, but modern pressure-treated boards use much safer, copper-based treatments. If you’re just growing root veggies and don’t want to break the bank, it’s a viable, cost-effective option. However, if you want something that naturally resists rot without any extra help, cedar vs pressure treated lumber usually comes down to longevity.
Cedar is the gold standard because it’s naturally rot-resistant and won’t leach anything into your soil, but it’s definitely going to cost you more upfront. I tend to view it as a long-term investment in your system; you build it once, and you don’t have to worry about it crumbling in three years. If you go the cheaper route with treated wood, just be mindful of how you manage your raised garden bed soil mix to ensure everything stays healthy. Either way, pick the material that fits your current budget so you can actually get the project finished this weekend.
Optimizing Garden Bed Dimensions for Vegetables and Effortless Maintenance
The biggest mistake I see people make is building beds that look great in a photo but are a nightmare to actually tend to. If you build a bed that’s four or five feet wide, you’re going to end up stepping into the soil to reach the middle, which compacts it and kills your plant roots. Stick to a width of about three feet if you can access it from both sides, or no more than two feet if it’s against a wall. Getting your garden bed dimensions for vegetables right from the start means you can reach everything without breaking your back or ruining your soil structure.
Keep the depth in mind, too. You don’t need a massive wooden fortress to grow anything useful. For most greens and herbs, twelve inches is plenty. If you’re planning on heavy hitters like carrots or deep-rooted tomatoes, aim for eighteen. Don’t overengineer the height just because you think it looks more professional; focus on what the plants actually need to thrive. A shallow, well-managed bed is always better than a deep one that you eventually abandon because it was too much work to fill.
Five ways to keep this from becoming a weekend-ruining disaster
- Don’t skip the hardware cloth. If you don’t line the bottom with a bit of metal mesh, you’re essentially building a luxury buffet for local gophers and moles. It’s a ten-minute job that saves you months of frustration.
- Use high-quality exterior screws, not cheap drywall ones. I’ve seen too many beds literally pull themselves apart after one heavy rain because someone tried to save five bucks on fasteners. Get the deck screws; they actually hold.
- Level the ground before you build. It sounds tedious, but if your base isn’t flat, the frame will warp and the soil will settle unevenly. A little bit of digging now prevents a lopsided mess later.
- Think about your reach. If you build a bed that’s four feet wide, make sure you can reach the middle from both sides without stepping into the dirt. Once you compact that soil by walking on it, nothing will grow right.
- Mix your soil with compost from the start. Don’t just dump cheap topsoil in there and hope for the best. A solid mix of compost and organic matter means you spend less time fertilizing and more time actually enjoying the harvest.
Final Thoughts on Your New Setup
At the end of the day, building a raised bed isn’t about becoming a master carpenter or having a Pinterest-perfect backyard. It’s about the logistics. You’ve picked the right wood to avoid rot, you’ve sized the beds so you can actually reach the middle without straining your back, and you’ve set up a frame that won’t fall apart after one heavy rain. Once the structure is in place, the real work shifts from construction to consistent maintenance. Remember that the goal was to create a system that works for you, not a project that demands your entire Saturday every single week. Keep the dimensions manageable and the materials durable, and you’ve already won half the battle.
I know it feels like a lot of effort just to get some dirt into a box, but there is something deeply grounding about seeing a system you built with your own hands actually produce something. Whether it’s a handful of basil for a pasta dish or a few tomatoes, these small, repeatable wins are what make the effort worth it. Don’t get hung up on perfection; a slightly crooked board won’t kill your plants. Just get it in the ground, get your seeds started, and focus on building a life that sustains itself one harvest at a time.
Frequently Asked Questions
Do I actually need to line the bottom with hardware cloth or landscape fabric to keep pests out?
Honestly, it depends on your ground. If you’re building on top of grass or dirt, use hardware cloth. It’s a fine metal mesh that stops moles and voles from turning your garden into a buffet. If you’re on a concrete patio, skip it. As for landscape fabric? I usually skip that too. It can mess with drainage and soil health. Just focus on the mesh if you have burrowing pests; otherwise, don’t over-engineer it.
How much soil am I realistically going to need to buy to fill these up without breaking the bank?
Don’t just eyeball it and end up with five half-empty bags or, worse, a massive surplus you can’t move. Grab a tape measure and use a basic volume calculator online—input your dimensions and it’ll give you the cubic feet you need. To save money, don’t buy 100% premium potting soil. Mix in some compost or cheap topsoil from a local nursery. It’s a better system: better nutrients for less cash.
Is there a way to build these that won't rot away after just one or two seasons?
Look, nobody wants to rebuild their garden every two years. If you want longevity without spending a fortune, go with cedar or redwood; they have natural rot resistance that holds up against damp soil. If you’re on a tighter budget, use heat-treated lumber instead of chemically treated stuff. Also, line the inside with heavy-duty plastic—just keep it away from the bottom so drainage still works. It’s a small extra step that saves a massive headache later.

