No-sew Curtain Tutorials for a Quick Room Refresh
I remember sitting on the floor of my first studio apartment, staring at these cheap, plastic-looking blinds that let in every single bit of streetlamp glare at 2 AM. I spent an entire weekend watching complex sewing tutorials, thinking I needed a heavy-duty machine and a degree in textile design to fix it. Honestly? That’s a lie. You don’t need a craft room or a massive budget to get decent privacy; you just need to stop overcomplicating the process of making diy curtains. Most of the “aesthetic” tutorials online are just performative labor designed to make you buy tools you’ll never use again.
I’m not here to teach you how to sew a Victorian masterpiece. Instead, I’m going to show you how to build a system for diy curtains that actually works for someone with a busy schedule and a limited toolkit. We’re going to focus on high-impact, low-effort methods—like using tension rods or simple hem tape—so you can get your space looking intentional without spending your entire Saturday fighting with a needle and thread. Let’s get your windows covered so you can actually enjoy your room.
Table of Contents
Guide Overview
Tools & Supplies
- Fabric scissors for clean edges
- Sewing machine for stitching seams
- Measuring tape for accurate dimensions
- Pins or clips to hold fabric in place
- Iron to press hems and creases
- Fabric (2-3 yards depending on window size)
- Thread (1 spool matching fabric color)
- Hem tape or interfacing (optional for structure)
Step-by-Step Instructions
- 1. First, stop scrolling through Pinterest for “inspiration” and actually measure your window. Grab a metal tape measure—don’t use a fabric one, they stretch and lie to you—and measure the width of the rod you want to use, not just the glass. You want your curtains to overlap the edges by at least a few inches on each side so you aren’t letting all that light leak in through the cracks.
- 2. Pick your fabric, but keep it realistic. Since we aren’t trying to spend our entire weekend at a sewing machine, look for pre-hemmed fabric bolts or even high-quality linen drop cloths from a hardware store. If you’re buying standard fabric, look for something with a decent weight; if it’s too thin, it’ll look cheap and won’t hang with that intentional, heavy drape we’re actually going for.
- 3. Instead of fighting with a sewing machine you probably don’t own, use heavy-duty hem tape. It’s a game changer. You just iron the tape between the two layers of fabric, press it down, and it bonds instantly. It’s a low-effort way to get a clean, professional edge without the headache of threading a needle or dealing with wonky stitches.
- 4. Decide on your hanging method before you finalize the top edge. If you want that minimalist, architectural look, go with hidden tab tops or simple rod pockets. If you want something a bit more “found object” and industrial, just use clip rings. Just make sure you leave enough extra fabric at the top to accommodate whatever hardware you’ve picked out.
- 5. Once the edges are set, hang them up and let them settle. This is the part people skip, but it’s vital. Let the fabric hang on the rod for at least 24 hours so the weight of the material pulls out any new creases from the ironing process. It’s much easier to steam out a wrinkle once the curtain is actually in its final position.
- 6. Finally, do a quick “functionality check.” Pull them shut, pull them open, and make sure they aren’t catching on the hardware or dragging on the floor in a way that collects dust. If they’re too long, don’t panic; just trim the bottom and re-apply the hem tape. The goal is a system that looks good and stays out of your way.
Smart Fabric Selection for Window Treatments Without the Stress
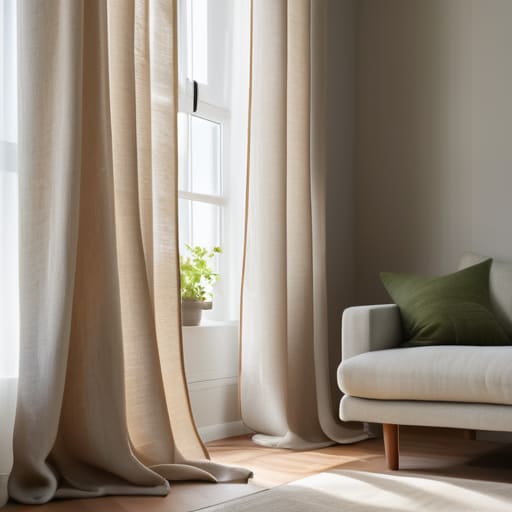
Don’t get paralyzed by the sheer amount of textile options at the craft store. The biggest mistake I see is people picking a fabric that looks great on a swatch but behaves like a nightmare once it’s actually hanging. If you want a low-maintenance setup, steer clear of high-maintenance silks or anything that wrinkles the second you look at it. For most of us, a heavy linen blend or a sturdy cotton canvas is the move. They have enough weight to hang straight without looking stiff, and they’re much more forgiving when it comes to fabric selection for window treatments.
If you aren’t interested in learning how to operate a sewing machine, don’t sweat it. You can skip the heavy lifting by using iron-on hem tape for curtains to get those clean, professional edges in about ten minutes. It’s a massive time-saver that avoids the “homemade” look that usually plagues these projects. Just make sure you’ve finished measuring windows for curtains accurately before you buy the yardage; there is nothing more frustrating than realizing you’re six inches short because you didn’t account for the drape.
The No Sew Shortcut Using Hem Tape for Curtains
Look, I get it. Most of us didn’t grow up with a sewing machine in the living room, and even if you did, the idea of sitting there for three hours stitching a straight line sounds exhausting. If you want the look of custom window drapery techniques without the actual labor, use hem tape for curtains. It’s a double-sided adhesive strip that bonds fabric together with just a bit of heat. You just fold your fabric to the desired length, lay the tape inside the fold, and run an iron over it. It’s fast, it’s clean, and it actually holds up through regular use.
The trick to making this look professional instead of “I did this in a dorm room” is all in the prep. Before you even touch the iron, make sure you’ve finished measuring windows for curtains accurately to account for that extra bit of fabric needed for the fold. If you don’t leave enough slack, your curtains will look stunted and awkward. Aim for a clean, crisp edge, and you’ll have high-end looking window treatments that look like they cost triple what they actually did.
5 Ways to Keep Your Curtains From Looking Like a High School Art Project
- Measure twice, then measure again. It sounds cliché, but there is nothing more frustrating than finishing a project only to realize your “custom” curtains are three inches too short to hit the floor. Measure from the rod to the floor, not just the window frame.
- Don’t ignore the weight of the fabric. If you’re using something super heavy but hanging it on a flimsy tension rod, those curtains are going to sag and look cheap within a week. Match your hardware to your textile weight.
- Steer clear of “perfect” symmetry. Real life is slightly off-kilter. If your pleats aren’t mathematically perfect, don’t sweat it—just make sure they are consistent. Consistency matters more than precision.
- Use double-sided tape for a quick fix. If you’re hanging curtains and notice a weird fold or a hem that’s acting up, a bit of heavy-duty double-sided tape can hold things in place while you decide if you actually want to commit to a sewing machine.
- Think about light control before you buy. If you’re doing this for aesthetics, go ahead and grab that linen blend. If you actually need to sleep past 6 AM, you need to prioritize blackout linings. Don’t sacrifice function for a “look” that leaves you staring at the sun.
The Bottom Line
At the end of the day, you don’t need a sewing machine or a massive budget to fix the vibe of your apartment. We covered how to pick a fabric that actually suits your light levels, how to skip the needle and thread entirely with hem tape, and how to keep the whole process from becoming a weekend-ruining ordeal. The goal wasn’t to turn you into a professional seamstress; it was to help you implement a functional system that gets your windows covered so you can stop staring at bare, uninviting frames. If you kept it simple and used the shortcuts we discussed, you’ve already done the hardest part.
Don’t let the pursuit of a “perfect” home stop you from actually living in it. I spent years thinking I couldn’t improve my space because I didn’t have the right tools or the specialized training, but I was wrong. Real progress comes from these small, repeatable wins that build momentum over time. Get those curtains up, reclaim your privacy, and move on to the next thing on your list. You don’t need to master every craft to create a space that actually serves your life instead of draining your energy.
Frequently Asked Questions
How do I make sure my DIY curtains don't look cheap or "crafty" once they're actually hanging?
The biggest giveaway of “cheap” DIY is poor hardware and bad hanging. If you use a flimsy tension rod, your curtains will sag, and the whole vibe is ruined. Invest in a solid, matte black or brass rod that actually has some weight to it. Also, hang the rod higher and wider than the actual window frame. It creates an illusion of height and makes the fabric look intentional rather than just tacked on.
If I'm using hem tape, how do I prevent the fabric from sagging or peeling off after a few weeks?
The biggest mistake people make with hem tape is being lazy with the iron. If you don’t apply enough heat or pressure, that bond isn’t going anywhere. Use a heavy steam iron—not just a quick pass—and hold it there for about 10-15 seconds per section. Also, don’t skip the “cool down” period. Let the fabric sit flat for an hour before you hang them. If you rush it, the bond fails.
What’s the best way to hang these if I’m renting and can't drill holes into the window frame?
If you’re renting, don’t sweat the drill. I used to stress about security deposits, but there are better ways. Grab a heavy-duty tension rod—it stays up using pressure alone, no holes required. If you want something more permanent-looking, look into Command curtain rod hooks. They’re surprisingly sturdy and peel off clean when you move. Just make sure you weigh your fabric first; you don’t want your DIY project sliding down the wall at 2 AM.

