The Trick to Installing Heavy-duty Floating Shelves
I was staring at a pile of expensive, pre-finished wood from a big-box retailer and a set of instructions that looked like they were written in a different language, wondering why I’d even bothered. Most people think you need a professional carpenter or a garage full of heavy-duty machinery to pull off a successful floating shelves diy project, but that’s a lie designed to keep you spending money you don’t have. I grew up in a space where every square inch mattered, and I learned early on that you don’t need a massive budget to make a small apartment feel intentional; you just need a solid system and the right tools.
In this guide, I’m stripping away the fluff and the expensive mistakes. I’m going to show you how to build and mount shelves that actually hold weight without looking like a high school shop project. We aren’t going to waste time on overcomplicated aesthetics that fall apart in a month; instead, we’re focusing on repeatable, functional wins that reclaim your wall space. By the time we’re done, you’ll have clean, minimalist storage that serves your life rather than adding to your chores.
Table of Contents
Guide Overview
Tools & Supplies
- Drill/Driver for mounting hardware
- Level to ensure shelves are straight
- Saw for cutting wood to size
- Sandpaper for smoothing edges
- Wood planks (2-3 pieces)
- Floating shelf brackets/rods (1 set)
- Wall anchors and screws (1 pack)
- Wood stain or paint (1 can)
Step-by-Step Instructions
- 1. First, grab your materials. You don’t need a workshop full of heavy machinery, just a solid piece of wood (I usually go for something like pine or oak depending on the budget), some heavy-duty floating shelf brackets, a level, a drill, and a stud finder. Don’t skip the stud finder; trying to anchor a shelf into just drywall is a fast way to end up with a pile of broken ceramics on your floor.
- 2. Locate your studs. This is the most important part of the entire process. Move your stud finder along the wall until you hit that solid wood behind the plaster. Use your black ink pen to mark the exact center of the studs on the wall. If your layout doesn’t align with the studs, you’ll need to use heavy-duty toggle bolts, but honestly, hitting the studs is the only way to ensure this thing stays put long-term.
- 3. Level out the brackets. Hold your first bracket up to your marks and place your level on top of it. This is where most people mess up—they assume walls are straight, but they almost never are. Adjust the bracket until the bubble is perfectly centered. Once it’s level, use your pencil to mark the screw holes, then drill your pilot holes.
- 4. Mount the brackets. Drive your screws into the pilot holes. If you’re hitting studs, it should feel solid and immediate. Give the bracket a quick, firm tug to make sure it isn’t wiggling. If it feels loose, stop right there and re-evaluate your placement before you even think about putting the wood on it.
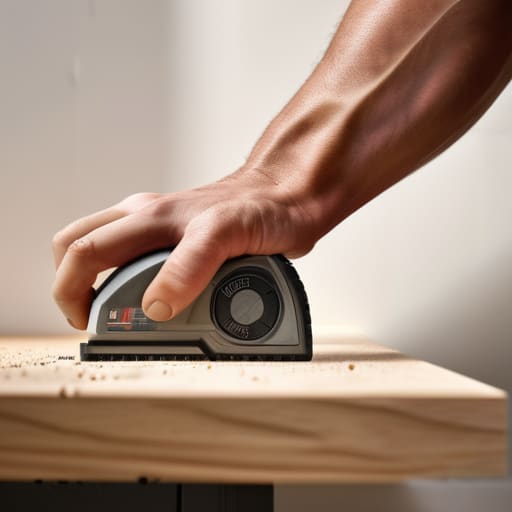
- 5. Prep the wood. If you bought a raw piece of lumber, give it a quick sand with some medium-grit sandpaper to get rid of any splinters or rough patches. You can leave it natural for that minimalist look, or hit it with a quick wipe of oil or stain. I prefer a matte finish—it looks more intentional and less like a DIY project gone wrong.
- 6. Slide the shelf on. Most floating shelf systems involve sliding the hollowed-out wood over the bracket arms. Align the shelf with the brackets and push it home. It should feel snug. If there’s a gap, you might need to sand the inside of the wood slightly or check if your brackets are sitting perfectly flush against the wall.
- 7. Test the weight. Don’t go dumping your entire book collection on there immediately. Start with something light—maybe a single plant or a small candle. Once you’re confident it’s holding, you can start adding your actual decor. The goal here is a functional system, not a decorative centerpiece that collapses the moment you lean on it.
Mastering Hidden Bracket Installation Without the Headache
The biggest mistake I see people make is assuming any wall can handle any weight. If you want that clean, seamless look, you have to respect the physics of hidden bracket installation. Don’t just eyeball it; grab a decent stud finder for wall shelves and find those wooden studs. If you try to rely solely on drywall anchors for a heavy piece of oak, you’re eventually going to end up with a pile of debris on your floor and a very expensive piece of scrap wood.
Once you’ve located the studs, level your bracket with precision. Even a two-degree tilt will be painfully obvious once the shelf is on. If you’re working with a hollow wall and can’t hit a stud exactly where you want it, look into heavy-duty toggle bolts rather than the cheap plastic ones that come in the box. It’s about building a system that lasts. I’d rather spend an extra ten minutes getting the mounting tension exactly right than spend my weekend patching holes in the drywall because I rushed the job.
Finding Your Stud Finder for Wall Shelves Without the Stress
Look, I’ve seen too many people ruin a perfectly good wall because they treated the stud finder like an optional suggestion. If you’re trying to implement modern minimalist shelving ideas, the last thing you want is a saggy shelf or, even worse, a hole in your drywall that looks like a crime scene. Most cheap electronic stud finders are basically glorified guessing machines—they’ll beep at a random wire or a piece of debris and leave you feeling confident right before your shelf collapses.
If you want to do this right, don’t just trust the first beep. I always use a two-step verification: find the stud with the electronic tool, then physically confirm it by tapping the wall or using a small finish nail to feel for resistance. If you’re working with heavier items, understanding your floating shelf weight capacity starts here. If you can’t hit a stud, you’ll need to pivot to heavy-duty toggle bolts, but honestly, hitting that solid wood is the only way to ensure your setup stays as stable as it looks.
Five Ways to Keep Your Shelves from Becoming a Project Nightmare
- Don’t get fancy with the wood. If you’re just starting, grab some pre-finished pine or even a decent piece of plywood from a local lumber yard. Spending three hours sanding a piece of wood you’ll never see the bottom of is a waste of your Saturday.
- Check your weight limits twice. I’ve seen too many people try to turn a minimalist floating shelf into a library, only to have the whole thing sag or rip out of the drywall. If you’re storing heavy books, skip the decorative brackets and go straight for heavy-duty anchors.
- Use a level, not your eyes. Your brain is a liar when it comes to straight lines, especially in older apartments where nothing is actually square. If the shelf is even slightly tilted, it’ll look amateur immediately. Use a real level, every single time.
- Prep your space before you drill. Nothing kills my momentum faster than having to stop halfway through because I realized I don’t have a vacuum to clean up the dust or a pencil to mark the holes. Have your tools, your cleaning rag, and your markings ready to go before you touch the drill.
- Keep the decor minimal. The whole point of floating shelves is to create a sense of space, not to add more visual clutter. Pick three items—maybe a plant, a single book, and a small ceramic piece—and leave the rest of the shelf empty. Let the architecture do the work.
The Final Result
At the end of the day, installing floating shelves isn’t about achieving some Pinterest-perfect showroom look; it’s about functional utility. We’ve covered how to locate your studs without losing your mind, how to keep those brackets hidden for a cleaner aesthetic, and how to ensure the weight is actually supported by the wall rather than just luck. If you followed the steps, you didn’t just put some wood on a wall—you built a repeatable system for organizing your space. You took a chaotic corner and turned it into a structured part of your environment, which is exactly how you keep a small apartment from feeling like it’s closing in on you.
Don’t let the fear of making a single wrong hole in the drywall stop you from starting. Perfection is a trap that leads to procrastination, and procrastination is just a way of letting your space dictate your mood. You now have the tools and the basic blueprint to take control of your surroundings. Once these shelves are up, you’ll realize that maintaining your home doesn’t have to be a massive, exhausting project. It’s just a series of small, intentional wins. Now, get those books or plants up there and get back to your actual life.
Frequently Asked Questions
How much weight can these actually hold before the drywall gives up?
Here’s the reality: if you’re just hitting drywall with anchors, don’t expect to store your heavy encyclopedias there. You’re looking at maybe 5–10 lbs tops before things get sketchy. If you want to actually use these for books or plants, you have to hit the studs. A well-secured shelf into a stud can handle way more—think 30+ lbs—but if you’re eyeballing it, keep it light. Don’t risk a hole in your wall for a heavy vase.
What’s the best way to hide the inevitable drill holes if I mess up the placement?
Look, we’ve all been there. You mark the spot, drill, and realize you’re two inches too high. Don’t panic. If the hole is small, a bit of lightweight spackle and a damp cloth is your best friend. Once it dries, hit it with a tiny bit of matching paint. If you really botched it, just shift the whole shelf layout slightly and use the “mistake” to hide a cable or a small plant.
Do I really need to hunt for studs, or can I just use heavy-duty anchors and call it a day?
Look, I get it. Hunting for studs feels like a chore you didn’t sign up for. If you’re just hanging a single dried flower or a lightweight photo, heavy-duty anchors are fine. But if you’re planning on actually using those shelves for books, plants, or anything with real weight, skip the shortcuts. Anchors eventually pull out of the drywall, and I’d rather you spend twenty minutes finding a stud now than two hours patching holes later.

