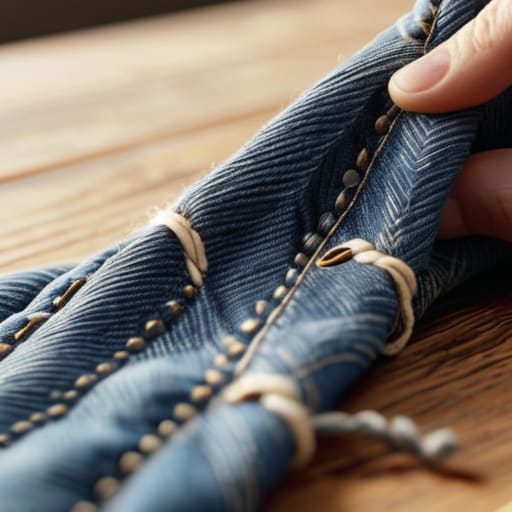
How to Repair Your Clothes So They Last for Years
I was sitting on my floor last Tuesday, staring at a jagged tear in my favorite heavy-duty work trousers, wondering if I should just toss them in the donation bin and buy a new pair. We’ve been conditioned to think that a loose thread or a small hole means a garment is officially dead, but that’s just a way to keep us spending money we shouldn’t be. Learning how to mend clothes isn’t about becoming a master tailor or spending your entire weekend hunched over a sewing machine; it’s about refusing to let a five-minute fix turn into a fifty-dollar replacement.
I’m not going to give you a lecture on complex embroidery or suggest you buy an entire sewing studio to get started. Instead, I’m sharing a low-friction system for basic repairs that actually works for people with busy lives. We’re going to cover the few essential tools you actually need, the three most common fixes that solve 90% of wardrobe issues, and how to do it all without wasting your afternoon. Let’s keep your gear in rotation and your bank account intact.
Table of Contents
Guide Overview
Tools & Supplies
- Hand sewing needles (various sizes for different fabrics)
- Fabric scissors (sharp blades for clean cuts)
- Seam ripper (to remove old, damaged stitching)
- Embroidery floss or all-purpose thread (3-5 assorted colors)
- Sewing kit/mending fabric scraps (small pieces of cotton or denim)
Step-by-Step Instructions
- 1. First, don’t go out and buy a massive, expensive sewing kit. You only need the basics to handle 90% of common issues: a small pack of needles, a few spools of thread in neutral colors (black, navy, grey, white), and a pair of sharp scissors. Keep these in a single dedicated container so you aren’t hunting for them every time a seam gives way.
- 2. Inspect the damage to see if it’s actually worth your time. If it’s a loose thread or a small hole in a cotton T-shirt, go for it. If it’s a massive tear in a heavy denim jacket that’s fraying at the edges, you might want to reconsider. I always ask myself: is this garment worth the ten minutes of effort? If the answer is yes, move to the next step.
- 3. Thread your needle and tie a knot at the end of the thread. Here’s the trick: don’t use a massive knot that creates a lump under the fabric. Just a small, tight one will do. If you’re working on something dark, try to match the thread color as closely as possible so the repair stays low-profile and doesn’t look like a neon sign pointing at your mistake.
- 4. For small holes or thinning fabric, use a “darning” technique. Instead of just sewing a circle around the hole, you want to weave the thread back and forth across the gap to create a new patch of fabric. Think of it like building a tiny web that fills the void. This makes the repair much stronger than just pulling the edges together, which usually just creates a new wrinkle.
- 5. If you’re dealing with a loose button, don’t just sew it on loosely. Place a toothpick or a matchstick between the button and the fabric while you sew. This creates a small amount of space so that when you’re finished, the button isn’t pulled so tight against the shirt that you can’t actually button it. Once you’ve wrapped the thread around the base a few times to secure it, pull the toothpick out and tie it off.
- 6. When you’re finished, don’t just rip the thread out. Cut it close to the knot, but leave a tiny bit of tail. If you have a single strand of thread left, you can use a tiny drop of clear nail polish to seal the knot if you’re worried about it unraveling. It sounds extra, but it’s a five-second insurance policy against the repair failing in the wash.
- 7. Finally, put your tools back exactly where they belong. The goal here isn’t to become a master tailor; it’s to have a functional system that prevents your clothes from ending up in a landfill. Once the repair is done, get back to whatever you were actually doing.
The Minimalist Sewing Kit Essentials for Beginners
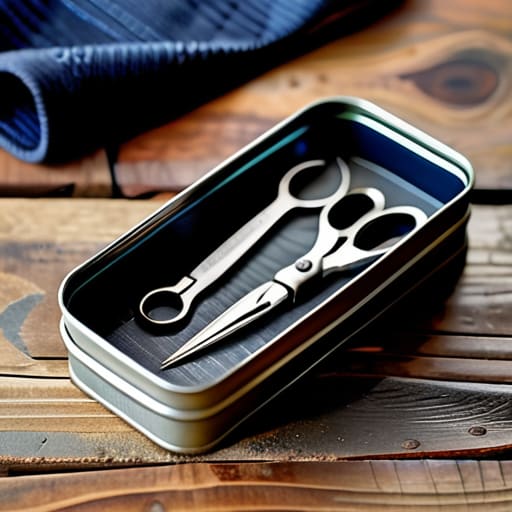
You don’t need a massive, plastic organizer filled with useless trinkets to get started. In fact, most of those pre-made kits are a waste of space. I keep mine in a small, dedicated tin that fits in a drawer—no clutter, just the tools that actually work. Start with a decent variety of needles, some high-quality polyester thread in neutral tones (black, navy, and grey cover 90% of issues), and a pair of sharp fabric shears. If you’re just repairing loose buttons or fixing a hem, these are the only needle and thread basics you truly need to stay functional.
If you want to level up, skip the cheap stuff and grab a small pack of safety pins and a seam ripper. The ripper is your best friend when you realize you’ve messed up a stitch; it saves you from the frustration of tearing the fabric. For heavier tasks, like learning how to patch denim holes, you might want to add a few heavy-duty needles to your collection. Keep it lean. The goal isn’t to become a tailor; it’s to have the right tools on hand so a small tear doesn’t turn into a reason to buy something new.
Mastering Invisible Mending Techniques Without the Wasted Effort
The goal isn’t to make a garment look brand new; it’s to make the repair look like it was always part of the design. If you’re dealing with a small snag or a thinning area, don’t reach for a heavy patch. Instead, focus on invisible mending techniques that mimic the original weave. For something like a worn spot on a sweater, a quick darning socks tutorial logic applies: you’re essentially re-weaving the fabric using a matching thread. The trick is to keep your tension loose. If you pull the thread too tight, you’ll create a puckered, ugly scar that ruins the drape of the piece.
When it comes to heavier stuff, like jeans, you have to decide if you want to hide the damage or lean into it. If you want to go the stealth route, you’ll need to learn how to patch denim holes from the inside using a scrap of similar weight. But if you’re short on time, don’t stress about perfection. Sometimes, a visible, intentional stitch is more efficient than spending an hour trying to play surgeon with a needle. Just pick a thread that’s close enough in color and get it done.
5 ways to stop the bleeding (and the spending)
- Don’t wait for the catastrophe. If you see a loose thread or a tiny fray, fix it right then. It takes thirty seconds to secure a seam, but it takes an hour of frustration when that seam eventually splits wide open mid-day.
- Stop overcomplicating the kit. You don’t need a massive sewing box from a craft store. A single needle, two spools of high-quality thread in neutral colors, and a pair of sharp snips are enough to handle 90% of what actually breaks.
- Match the thread weight to the fabric, not your mood. Using heavy-duty upholstery thread on a thin cotton tee is a recipe for puckered, ugly seams. Check the fabric weight first so the repair actually blends in instead of looking like a scar.
- Use the “backstitch” for anything that actually carries weight. If you’re fixing a seam on jeans or a heavy jacket, a simple running stitch won’t hold. The backstitch gives you that structural integrity without needing a sewing machine.
- Accept that “perfect” is the enemy of “functional.” If a patch is slightly visible or a stitch isn’t mathematically straight, who cares? As long as the garment is wearable and the hole is closed, the system is working.
Stop the cycle of replacement
At the end of the day, mending isn’t about becoming a master tailor or spending your entire Saturday hunched over a piece of denim. It’s about having the right tools—that basic kit we talked about—and knowing that a loose thread or a small snag doesn’t mean a garment is dead. Whether you’re using a quick running stitch to secure a button or attempting an invisible mend to save your favorite sweater, the goal is the same: maintain what you already own. By applying these low-friction techniques, you stop the constant cycle of buying cheap, disposable clothes just to replace them when they inevitably fail you.
We live in a culture that tells us if something is broken, it’s trash. I’ve never bought into that. There is a quiet, steady kind of confidence that comes from knowing you can fix your own world in small, manageable ways. Every time you choose to repair instead of replace, you’re reclaiming a bit of your time and your money. It’s not about being perfect; it’s about building a lifestyle that is resilient and intentional. So, grab your needle, fix that one thing that’s been bugging you, and move on with your day. You’ve got better things to do.
Frequently Asked Questions
How do I know when a piece of clothing is actually worth the effort of mending versus just letting it go?
Don’t get sentimental over a cheap fast-fashion tee that’s lost its shape; it’s not worth the time. Use the “Cost vs. Friction” rule: if the item is high-quality, fits you perfectly, or costs more than a decent meal to replace, mend it. If it’s a basic staple that’s structurally failing—like shredded fabric or massive holes—just let it go. Save your energy for the pieces that actually anchor your wardrobe.
What do I do if I accidentally make a hole even bigger while trying to fix it?
Don’t panic and don’t toss the garment in the trash. If you’ve accidentally made the hole bigger, you’ve just transitioned from a “repair” to a “reinforcement” job. Stop trying to stitch the edges together—that just creates tension and more tearing. Instead, grab a scrap of similar fabric or a patch, place it underneath the hole, and stitch through both layers. It’s a bit more work, but it’s a permanent fix that actually holds.
Are there specific fabrics, like stretchy gym clothes or heavy denim, that I should avoid trying to fix myself?
Look, some things aren’t worth the headache. If you’re dealing with high-performance spandex or gym gear, skip it. Once those synthetic fibers lose their stretch or get a snag, trying to sew them usually just makes the hole bigger and the fabric bunchy. Same goes for heavy, raw denim if you don’t have a heavy-duty needle; you’ll likely just snap your thread or hurt your fingers. If it’s too technical, save your energy for the basics.

