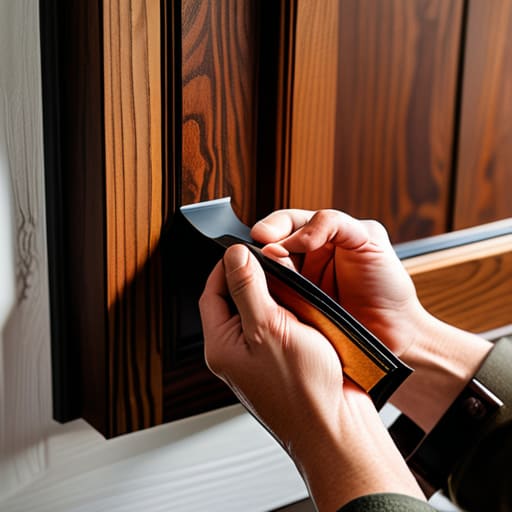
Seal Your Doors to Keep the Heat in and Costs Down
I was sitting on my floor last November, trying to focus on a project, when I realized I could actually feel the hallway air creeping under my bedroom door like a cold ghost. It’s one of those small, annoying things that makes you feel like your space is working against you instead of for you. Most people think you need to call an expensive contractor or commit to a weekend-long renovation to fix a draft, but that’s nonsense. Honestly, weatherstripping a door is one of those low-effort, high-reward tasks that most of us overlook until our utility bills start looking ridiculous.
I’m not going to give you a list of twenty different specialized tools you don’t own or suggest some complex DIY project that eats up your entire Saturday. Instead, I’m going to show you how to identify exactly where the air is escaping and how to fix it with a few basic materials you can grab on a quick run to the hardware store. We’re going to focus on repeatable, efficient wins—getting that seal tight so you can actually keep your heat where it belongs without breaking your budget.
Table of Contents
Guide Overview
Tools & Supplies
- Measuring tape for determining door dimensions
- Scissors or utility knife for trimming material
- Cleaning cloth for surface preparation
- Weatherstripping roll or strips (length matching door perimeter)
- Adhesive remover or rubbing alcohol for cleaning surfaces
Step-by-Step Instructions
- 1. First, grab a flashlight and do the light test. Close your door during the day and look for slivers of light peeking through the edges or the bottom. If you can see light, you’re definitely losing money through those gaps every time the AC or heater kicks on.
- 2. Before you buy anything, you need to clean the surface. I know, it sounds tedious, but if you slap new adhesive onto a layer of dust and old grime, it’s going to peel off in a week. Grab some isopropyl alcohol and a clean rag and wipe down the door frame where the seal will actually sit.
- 3. Figure out which type of weatherstripping you actually need. For the sides and top, a self-adhesive foam strip or a rubber V-seal works best. If the draft is coming from the floor, skip the foam and look for a “door sweep.” Don’t overcomplicate this; just match the gap size to the product thickness so you aren’t fighting the door to get it to latch.
- 4. Measure twice, cut once. Use a measuring tape to get the exact length of your door frame, and then use a sharp utility knife or scissors to cut your stripping. I usually cut it about a fraction of an inch longer than the frame just to ensure there isn’t a gap at the very corners.
- 5. Peel the backing off the adhesive strip slowly. Start at the top corner and press it firmly into the frame. Don’t just lightly touch it; you want to apply consistent pressure along the entire length to make sure that bond is permanent.
- 6. Install your door sweep if that’s part of the problem. If you’re using a screw-on version, make sure you’re drilling into the bottom of the door itself, not just the trim. It’s a five-minute job that makes a massive difference in how much heat stays inside your apartment.
- 7. Do a final test. Close the door and feel around the edges with your hand to check for any lingering drafts. If you feel a breeze, you might need to adjust the placement slightly or add a bit more material. Once it’s tight but still closes without a struggle, you’re done.
Choosing Your Weapon Foam vs Rubber Weatherstripping
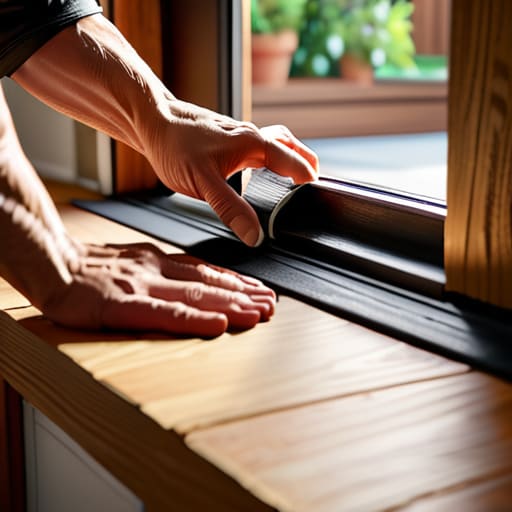
Before you head to the hardware store, you need to decide what you’re actually fighting against. Most people grab the first roll of adhesive foam they see because it’s cheap and easy, but that’s usually a mistake. If you’re looking at foam vs rubber weatherstripping, think about durability. Foam is fine for a temporary fix or a low-traffic closet door, but it tends to compress and crumble after a few months of heavy use. If this is an exterior door that gets slammed or hit by direct sunlight, go with rubber. It’s denser, holds its shape better, and is much more effective for long-term energy efficient home sealing.
The “best” option really depends on where the air is actually escaping. If you have large gaps between the door and the frame, a thick rubber D-profile strip is your best bet to create a tight seal. However, if the draft is coming from the very bottom of the door, you’re looking at a different project entirely—specifically a door bottom seal installation. Don’t try to patch a massive floor gap with thin tape; you’ll just end up frustrated and out of pocket for more supplies.
The 15 Minute Fix for Reducing Heating Bills With Door Seals
Look, I’m not interested in the “total home overhaul” approach. If you’re trying to tackle reducing heating bills with door seals, don’t get overwhelmed by the idea of sealing every crack in your apartment. Start with the high-traffic entry points. Most of the heat you’re paying for is likely escaping right under your feet or through the gaps where the door meets the frame. It’s a massive leak in your budget that most people just ignore because they think it’s too much work to fix.
If you want the most bang for your buck, focus on the door bottom seal installation first. That gap at the floor is usually the biggest culprit. If you can block that draft, you’ll notice a difference in how your space holds temperature almost immediately. It’s not about achieving some perfect, airtight laboratory environment; it’s about stopping the obvious leaks so your heater isn’t working overtime for no reason. Spend fifteen minutes on this, and you’ve essentially given yourself a small, permanent raise by lowering your monthly utility costs.
Pro-tips to keep it from being a waste of time
- Clean the surface like you actually mean it. If there’s old dust or sticky residue on the door frame, that new strip isn’t going to stick for more than a week. Wipe it down with some rubbing alcohol first.
- Don’t go overboard with the thickness. If you jam a massive, thick strip into a tight gap, you’re going to end up fighting the door every time you try to close it. Aim for a seal, not a struggle.
- Check the bottom, not just the sides. Most people obsess over the sides of the frame and completely forget the door sweep. That’s where the real drafts—and the money—usually escape.
- Test the seal with a piece of paper. Close the door on a sheet of paper; if you can pull it out easily without any resistance, your weatherstripping isn’t doing its job.
- Buy more than you think you need. There is nothing more annoying than being halfway through a job on a Sunday night and realizing you’re three inches short of a complete seal.
The Bottom Line
At the end of the day, this isn’t about becoming a master carpenter or undergoing a massive renovation. It’s just about the basics: cleaning the surface so the adhesive actually sticks, picking the right material—whether that’s the cheap foam for small gaps or the more durable rubber for heavy-duty use—and getting it applied straight. If you do these three things, you’ve already won. You’ve effectively plugged a leak in your wallet and stopped your heat from escaping into the hallway. It’s a small, mechanical fix that pays for itself in a few months of lower utility bills, and honestly, that’s exactly the kind of low-effort, high-reward system I’m always looking for.
We often get paralyzed by the idea that maintaining a home or managing a budget requires a huge amount of time or specialized knowledge. But most of the things that keep our lives running smoothly are actually just a series of small, manageable adjustments. You don’t need a massive inheritance to live comfortably; you just need to take control of the small stuff before it becomes a bigger problem. Seal the door, save the money, and use that extra breathing room to focus on something that actually matters to you. Keep it simple, keep it functional, and just keep moving forward.
Frequently Asked Questions
How do I know if I need to seal the sides of the door or just the bottom sweep?
The easiest way to tell is the “flashlight test.” Wait until it’s dark, have someone stand outside with a bright light, and close the door. Anywhere you see light peeking through the cracks—the sides, the top, or the bottom—is where air is escaping. If you feel a draft hitting your ankles, it’s the sweep. If you feel it on your face or shoulders, you need to seal the sides too.
Is there a way to fix this without making the door impossible to latch or lock?
That’s the biggest fear with DIY seals, and it’s a valid one. If you go too thick, you’re fighting the door every time you want to leave. The trick is to focus on the perimeter—the sides and the top—rather than just jamming stuff into the threshold. Start with the thinnest strip you can find. If the latch doesn’t catch easily, trim a sliver off. It’s a game of millimeters, not a sledgehammer approach.
Will this stuff actually stay stuck if my apartment gets really humid or cold?
It’s a fair question. If you’re using the cheap, thin foam stuff from a bargain bin, it’ll probably peel off the first time the humidity hits. But if you grab a decent rubber seal with a strong adhesive backing, it’ll hold. My advice? Clean the door frame with a quick wipe of rubbing alcohol first. If there’s dust or oil in the way, nothing is sticking—not even the expensive stuff.

