
How to Construct a Solid Desk Without Breaking the Bank
I was sitting on a milk crate last Tuesday, trying to coordinate a freelance project on a laptop balanced precariously on a stack of old textbooks, when I realized my “workspace” was actually a recipe for a back injury. Most people think that learning how to build a desk requires a massive workshop, a garage full of expensive power tools, and a weekend you’ll never get back. That’s a lie. I grew up in a space where we had to make do with whatever was on hand, and I’ve learned that you don’t need a master carpenter’s budget to create a surface that actually supports your life instead of just cluttering it up.
In this guide, I’m skipping the fluff and the overly complicated blueprints that assume you have a professional studio. I’m going to show you a streamlined, low-effort system for constructing a sturdy, minimalist workstation using basic materials you can grab on a lunch break. We’re focusing on repeatable wins: a design that looks intentional, costs less than a fancy dinner out, and can be assembled without losing your mind. Let’s get your setup sorted so you can stop working from your lap and actually start producing.
Table of Contents
Guide Overview
Tools & Supplies
- Drill/Driver for assembling screws and fasteners
- Measuring Tape for accurate cuts and placement
- Sandpaper for smoothing edges and surfaces
- Level to ensure a flat working surface
- Wood Desktop (1 piece)
- Wooden Legs or Table Base (4 pieces)
- Wood Screws (1 pack)
- Wood Glue (1 bottle)
Step-by-Step Instructions
- 1. First, don’t overthink the design; we’re going for a “slab and legs” approach because it’s the fastest way to get a functional surface without needing a degree in carpentry. Go to a local hardware store and find a pre-cut butcher block or a solid wood countertop—make sure it’s at least 24 inches deep so you actually have room for your laptop and a coffee. I usually pick up a piece that’s already sanded down to save myself the massive headache of manual sanding.
- 2. Next, grab four heavy-duty steel hairpin legs or simple metal trestles. I prefer these because they require almost zero assembly and they give the desk a clean, minimalist look that doesn’t crowd your floor space. Before you buy anything, measure your tabletop to ensure the leg spread won’t make the whole thing wobble like crazy when you’re typing.
- 3. Clear a flat space on your floor—ideally a rug or some cardboard so you don’t scratch your new wood—and flip your tabletop upside down. This is where you’ll mark your screw holes. Use my notebook to sketch out where the legs will go, keeping them about two inches from the edges to ensure the weight is distributed evenly across the surface.
- 4. Grab a power drill and some short wood screws, but here is the part where most people mess up: check the thickness of your tabletop first. You do not want a screw tip poking through the top of your desk and ruining your gear. I always double-check the screw length against the wood thickness before I even think about driving anything in.
- 5. Pre-drill your pilot holes. If you try to drive a screw directly into hardwood without a pilot hole, you’re going to split the wood, and then your “simple” project just became an expensive mistake. Use a drill bit that is slightly thinner than your screw; this keeps the process smooth and controlled.
- 6. Now, align your legs with your marks and drive the screws in. Don’t go full blast with the drill immediately; start them by hand or on a low speed to make sure they’re going in straight. Once they’re seated, give them a final tighten until the legs feel completely solid against the wood.
- 7. Flip the desk back over—get a friend to help if the slab is heavy, don’t wreck your back—and give it a quick wipe down with a damp cloth to get rid of any construction dust. If the wood feels a little thirsty, rub in a bit of beeswax or mineral oil. That’s it. You now have a workspace that didn’t cost a month’s rent or a weekend of soul-crushing labor.
Mastering Custom Desk Dimensions Without the Headache
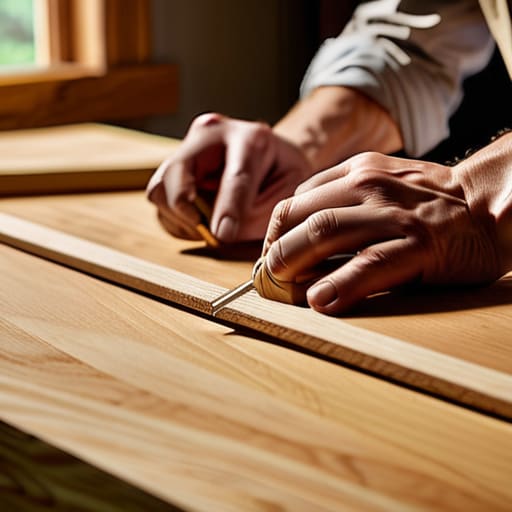
The biggest mistake I see people make is treating a desk like a piece of standard furniture rather than a tool tailored to their specific body. Most “one size fits all” options from big-box retailers end up being either too high, causing shoulder strain, or too shallow, leaving your monitor uncomfortably close to your eyes. When you’re figuring out custom desk dimensions, start with your chair height and your elbow position. You want your forearms to rest parallel to the floor without you having to hunch or reach. It’s about ergonomic desk design that actually respects your posture, not just something that looks good in a photo.
Don’t overcomplicate the math, either. Grab that notebook I’m always talking about and map out your “reach zone”—the area where your mouse, keyboard, and coffee sit. If you’re working in a tight apartment like I was, even an extra two inches of depth can be the difference between feeling cramped and feeling focused. You don’t need fancy woodworking tools for beginners to get this right; you just need a tape measure and a realistic understanding of how much space your legs actually need to move.
Selecting Affordable Desk Materials That Actually Last
Look, the biggest mistake I see is people thinking they need to drop a month’s rent on solid walnut just to get a decent workspace. You don’t. If you’re working with a tight budget, look toward high-quality plywood or even a thick butcher block from a big-box store. These are solid, reliable affordable desk materials that won’t warp the second you set a coffee mug down. I used to try and make do with cheap particle board from my childhood apartment, but it eventually crumbled under the weight of my gear. It’s not worth the headache of replacing it six months later.
When you’re picking your surfaces, focus on the density. A heavier slab means a more stable station, which is vital for an ergonomic desk design that doesn’t wobble while you’re typing. If you go the plywood route, don’t skip the sanding. You don’t need a workshop full of expensive woodworking tools for beginners to get a smooth finish; a decent orbital sander and some patience will do the trick. The goal isn’t perfection—it’s a surface that feels good under your hands and holds up to your daily grind.
Five ways to avoid a DIY disaster
- Don’t overcomplicate the design; a simple tabletop on sturdy legs will always outperform a complex, custom-carved monstrosity that wobbles every time you type.
- Buy a decent drill if you can afford it—skimping on tools is the fastest way to end up with stripped screws and a desk that feels like it’s made of cardboard.
- Measure your space twice, but more importantly, measure your chair height; there is nothing worse than building a beautiful desk only to realize your legs don’t fit underneath it.
- Sand your edges more than you think you need to; your forearms will thank you when you aren’t getting splinters every time you reach for your coffee.
- Keep your hardware organized in a small bin or even a muffin tin while you work so you aren’t hunting for that one specific screw when you’re halfway through the final step.
Getting it Done
At the end of the day, building this desk isn’t about achieving some level of master craftsmanship or making something that belongs in a museum. It’s about the math and the materials. You’ve figured out the dimensions that won’t wreck your back, you’ve picked materials that won’t crumble in six months, and you’ve bypassed the overpriced “designer” markup. By focusing on functional simplicity over unnecessary complexity, you’ve created a workspace that serves your specific needs without draining your savings. You didn’t just build a piece of furniture; you built a reliable system for your daily workflow.
I know the urge to keep tweaking or to wait until you have “better” tools is strong, but don’t fall into that trap. Perfectionism is just another way of procrastinating on actually living. The goal here was to stop working from a cramped kitchen table and start working from a space you actually control. Now that the sawdust has settled, take a second to appreciate the fact that you made this happen on your own terms. You don’t need a massive inheritance or a specialized degree to create a stable foundation for your life. Just grab your coffee, sit down, and get to work.
Frequently Asked Questions
I don't have a garage or a workshop; can I actually pull this off in a small apartment without losing my mind (or my security deposit)?
Look, I grew up in a tiny apartment where the “workshop” was a corner of the kitchen table. You can absolutely do this without losing your deposit or your sanity. The secret is containment. Buy a heavy-duty drop cloth or even a cheap tarp to catch the sawdust, and keep a cordless vacuum within arm’s reach. Work in small, manageable bursts rather than one massive, messy marathon. It’s about control, not space.
How do I make sure this thing won't wobble or collapse if I'm leaning on it while working?
The “wobble factor” is usually a sign of a bad foundation, not bad luck. If you’re leaning in to focus, you need structural integrity. First, skip the cheap, spindly legs; go for something with a wider footprint or a heavy-duty steel frame. Second, use actual wood screws, not those flimsy cam locks. Finally, if it still feels shaky, add a simple cross-brace or a small L-bracket to the back. Stability is just physics, not magic.
What’s the absolute minimum tool kit I need to buy so I'm not wasting money on stuff I'll never use again?
Look, don’t fall for the “150-piece starter kit” trap. Most of that is just cheap plastic filler that’ll break by the second screw. You really only need four things: a decent cordless drill with a driver bit set, a multi-bit screwdriver, a 16oz hammer, and a tape measure. If you buy quality basics now, they’ll actually serve you for the next decade instead of cluttering your junk drawer. Keep it lean.

