
Better Than Takeout: Making Epic Homemade Pizza
You don’t need a $1,000 stone oven or a three-day fermentation process to stop settling for mediocre delivery. I used to think that learning how to make homemade pizza meant turning my tiny kitchen into a flour-dusted disaster zone just to get a decent crust. I spent way too many Friday nights watching YouTube tutorials that made it look like a professional culinary exam, only to end up with a soggy, sad mess that tasted more like cardboard than anything edible. The truth is, most of those high-effort methods are just unnecessary friction that keeps you from actually enjoying your food.
I’m not here to sell you on a lifestyle you don’t have time for. Instead, I want to show you a low-maintenance system that works with the tools you already own and the limited time you actually have. I’ve stripped away the pretension to give you a repeatable, no-nonsense framework for a killer crust and simple toppings. We’re focusing on small, efficient wins that ensure your dinner is actually better than takeout, without making your kitchen feel like a construction site.
Table of Contents
Recipe Details
Ingredients
- 2 cups all-purpose flour
- 1 cup warm water
- 1 teaspoon active dry yeast
- 1 teaspoon salt
- 1/2 cup tomato sauce
- 1.5 cups shredded mozzarella cheese
- 1/4 cup fresh basil leaves
Recipe Instructions
Step 1
Get your dough started early. I’m not talking about a three-day fermentation process that requires a degree in chemistry; I just want a reliable base. Mix about 3 cups of bread flour (it has more protein than all-purpose, which helps the structure) with a teaspoon of salt, a packet of instant yeast, and about 1.25 cups of warm water. Mix it until it’s a shaggy mess, cover the bowl, and let it sit on your counter for at least an hour. If you have the time, let it double in size so the texture is actually worth the effort.
Step 2
Prep your workspace and your heat. Most people fail at home pizza because their oven isn’t hot enough. Turn your oven up to its absolute maximum setting—usually around 500°F (260°C)—at least 30 minutes before you plan to bake. If you own a pizza stone or a heavy baking sheet, slide it in there now so it gets screaming hot. We want that bottom crust to crisp up instantly, not turn into a soggy cracker.
Step 3
Shape the dough without the drama. Forget the rolling pin; it squeezes all the air out of the dough and leaves you with a dense, heavy disc. Instead, flour your counter generously and use your hands to gently stretch the dough from the center outward. If it keeps snapping back, just walk away for five minutes to let the gluten relax. You’re looking for a rough, rustic shape, not a perfect circle from a textbook.
Step 4
Build your layers with intention. This is where most people overcomplicate things and ruin the balance. Spread a thin layer of crushed canned San Marzano tomatoes (or whatever good quality sauce you can find) across the dough, leaving an inch for the crust. Add your cheese—fresh mozzarella is great, but it can get watery, so pat it dry first. Keep your toppings light; if you pile on ten different ingredients, the weight will prevent the dough from rising and the middle will stay gummy.
Step 5
The bake and the finish. Carefully slide your pizza onto the hot stone or baking sheet using a piece of parchment paper if you don’t have a peel. Bake it for about 8 to 12 minutes, or until the crust is charred in spots and the cheese is bubbling. Once it hits the cutting board, don’t just dive in. Let it sit for two minutes so the cheese sets, then hit it with a drizzle of olive oil or some fresh basil. It’s a small, repeatable win that beats any delivery app every single time.
The Best Pizza Dough Recipe for Busy People
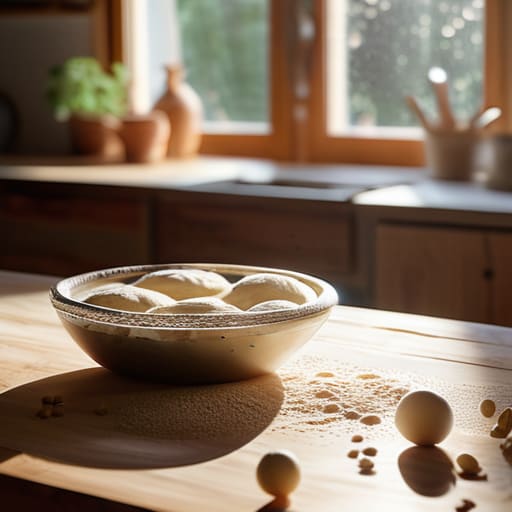
The secret to this being the best pizza dough recipe for someone with a life that doesn’t revolve around a kitchen is understanding that time does the heavy lifting, not you. I grew up watching my mom try to rush everything, but you can’t rush biology. If you have the headspace, let that dough sit in the fridge overnight. This slow yeast fermentation process does two things: it develops a much deeper, complex flavor and makes the dough significantly easier to handle when you’re actually ready to cook. It turns a mediocre crust into something that actually tastes like it came from a place that knows what they’re doing.
When it comes to the actual execution, don’t stress about perfection. I used to get hung up on trying to get a perfectly circular shape, but the goal here is utility and taste. If you’re nervous about stretching pizza dough by hand, just use your fingers to press it out from the center rather than using a rolling pin, which kills all those lovely air bubbles. If you want those crispy pizza crust secrets without buying a thousand-dollar stone, just use a preheated heavy baking sheet or a cast-iron skillet. It’s about working with what you have to get a win.
Mastering the Yeast Fermentation Process for Flavor
If you want to move from “okay” to “actually incredible,” you have to respect the yeast fermentation process. Most people treat dough like a countdown clock, but I view it as a slow build. If you have the patience, let your dough sit in the fridge for 24 to 48 hours. This cold fermentation is one of those crispy pizza crust secrets that makes a massive difference; the yeast works slower, breaking down sugars more thoroughly and creating those beautiful, complex charred bubbles you usually only see in high-end wood-fired spots.
Don’t feel like you have to follow a strict timeline, though. If you’re in a rush, a quick room-temperature rise works, but you’ll lose that deep, sourdough-adjacent tang. I’ve found that even an extra six hours in the cold can transform a basic dough into something that feels intentional. It’s not about adding more ingredients; it’s about giving the ingredients time to do their job. Once you master this timing, you stop just making food and start building flavor.
5 Ways to Stop Making Pizza a Chore
- Buy a pizza stone or a heavy baking steel. If you’re still using a standard thin baking sheet, you’re fighting a losing battle against soggy crusts. You need thermal mass to get that crisp bottom without having to babysit the oven.
- Don’t drown the dough in sauce. I see people loading up on sauce like they’re trying to hide a bad crust. A little goes a long way; too much moisture is the fastest way to turn your masterpiece into a wet, structural disaster.
- Use high-moisture mozzarella, but drain it first. If you pull a ball of fresh mozzarella straight from the brine and throw it on, you’re essentially inviting a puddle of water to your dinner party. Pat it dry with paper towels first.
- Pre-heat your oven for at least 45 minutes. Most people think “oven is hot” means the light turned off. It doesn’t. Your stone or steel needs time to actually soak up that heat so it can cook the dough the second it hits the surface.
- Keep your toppings minimal. This isn’t a buffet. Pick two or three high-quality ingredients and let them breathe. A crowded pizza won’t cook evenly, and you’ll end up with a pile of lukewarm toppings sliding off a limp base.
The Bottom Line
At the end of the day, making great pizza isn’t about owning a $1,000 wood-fired oven or spending your entire Saturday hovering over a kitchen counter. It’s about the small, repeatable wins we talked about: getting the dough hydration right, letting the yeast do the heavy lifting through fermentation, and not overthinking the toppings. Once you have this basic system down, you stop being a slave to delivery apps and start treating your kitchen like a place of utility rather than a source of stress. It’s a low-effort, high-reward loop that keeps your budget intact and your dinner actually worth eating.
Don’t feel like you have to master every single variable on your first try. Some batches will be a little too thick, and some might come out a bit charred, but that’s just part of the process. The goal isn’t perfection; it’s about building a skill that serves you when you’re tired and hungry after a long week. Grab your notebook, jot down what worked for you, and just keep iterating. You’re building a more functional, more delicious life, one slice at a time.
Frequently Asked Questions
My dough isn't rising at all; did I kill the yeast or is my kitchen just too cold?
It’s likely one of two things. First, check your water temperature. If it was too hot when you mixed it, you essentially boiled the yeast to death. If it was lukewarm, you’re probably fine. Second, if your kitchen is cold, the yeast is just sleeping. Don’t panic; just move the bowl to a slightly warmer spot—like inside an oven that’s turned off with the light on. Give it time to wake up.
Can I make this dough ahead of time, or do I have to bake it the second it's ready?
You absolutely don’t have to bake it immediately. In fact, the “set it and forget it” method is better. If you aren’t ready to eat, just pop the dough in the fridge. That cold fermentation actually develops better flavor over 24 to 48 hours. Just pull it out about an hour before you want to bake so it can come back to room temperature. It’s a low-effort way to prep for a better meal later.
I don't have a pizza stone—is there a way to get a crispy crust using just a regular baking sheet?
You don’t need a fancy stone to get a decent crunch. Honestly, most of us don’t have the counter space for one anyway. Just flip your baking sheet upside down. Using the back of the tray creates a flat, elevated surface that lets hot air circulate better around the dough. If you want to level up, preheat that empty tray in the oven for twenty minutes before sliding the pizza on. It mimics a stone’s heat retention without the price tag.